home improvement
How to Install a Bathroom Faucet
Installing a new bathroom faucet is a straightforward DIY project that can enhance your bathroom’s appearance and functionality. Begin by gathering necessary tools and preparing your workspace. Remove the old faucet, clean the area, and install the new fixture with proper sealing and connections. Check for leaks to ensure a successful installation.

Last Updated on October 24, 2025 by Daily News Staff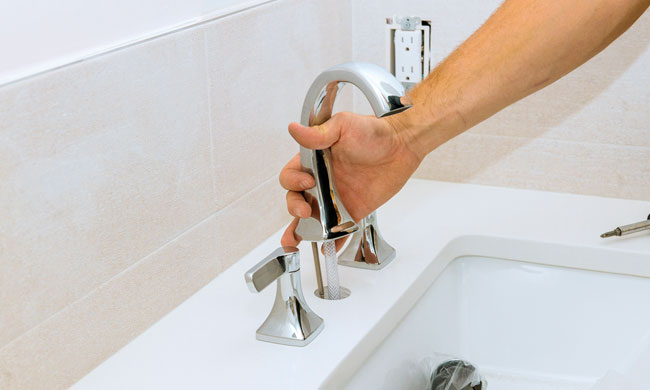
How to Install a Bathroom Faucet
(Family Features) Transforming your bathroom into a modern oasis doesn’t require a large budget or a team of professionals. In fact, a few inexpensive DIY projects can significantly improve the look and feel of your bathroom, including replacing outdated fixtures with new, modern ones you can install yourself.
While installing a new faucet can seem daunting, with the right tools and a little patience, it’s a relatively simple task that can refresh the look of your bathroom and improve functionality.
Before you begin, gather the necessary tools – an adjustable wrench, basin wrench, plumber’s tape and putty or sealant – then consider this guidance to easily transform your space and achieve a professional finish.
Prepare Your Workspace
Clear the area under the sink to provide ample workspace. Turn off the water supply valves by rotating them clockwise. Place a bucket under the faucet connections then open the faucet to let any remaining water drain out. If your sink has a pop-up drain assembly, remove it to give yourself more room to work.
Remove the Old Faucet
Using an adjustable wrench, disconnect the water supply lines. Once disconnected, use a basin wrench to loosen and remove the nuts securing the faucet. Gently lift the old faucet out of its mounting hole, using a putty knife to carefully pry it free, if necessary. Then clean the area to remove any residue and ensure a good seal for the new fixture.
Install the New Faucet
Apply a bead of plumber’s putty or a ring of silicone sealant around the base of the new faucet. Insert it into the mounting holes on the sink. From beneath the sink, secure the faucet in place with the provided nuts, tightening them using a basin wrench. Reconnect the water supply lines to the corresponding hot and cold inlets on the faucet. Turn the water supply back on to check for leaks. Adjust as necessary to ensure a tight fit. Finally, reattach the pop-up drain assembly if you removed it earlier.
Find more DIY projects to improve the aesthetics and functionality of your home at eLivingtoday.com.
Photo courtesy of Shutterstock
Bathroom Faucet
SOURCE:
STM Daily News is a vibrant news blog dedicated to sharing the brighter side of human experiences. Emphasizing positive, uplifting stories, the site focuses on delivering inspiring, informative, and well-researched content. With a commitment to accurate, fair, and responsible journalism, STM Daily News aims to foster a community of readers passionate about positive change and engaged in meaningful conversations. Join the movement and explore stories that celebrate the positive impacts shaping our world.

How Invasive Pests Spread and How You Can Help Stop Them
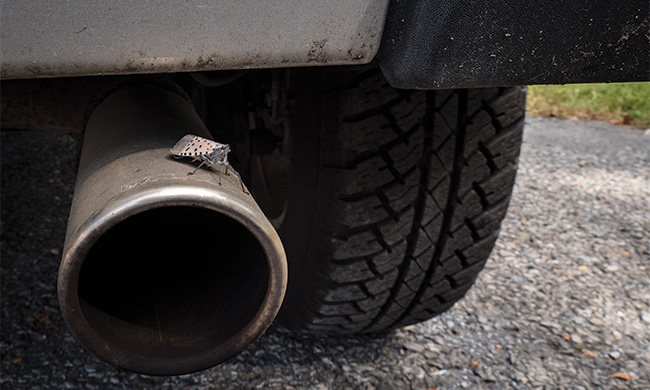
(Feature Impact) Invasive pests can hide in places you’d never expect, and once they spread, they can destroy the trees, plants and food people rely on every day. These pests pose a serious threat to agriculture, forests, ecosystems and the food supply. Many invasive species cannot travel far on their own; instead people unknowingly move them from place to place.
According to the U.S. Department of Agriculture’s Animal and Plant Health Inspection Service, invasive pests hitchhike on everyday items such as plants, produce, firewood, vehicles and outdoor equipment. That makes many common activities – from traveling and online shopping to camping and gardening – potential “pathways” for invasive pests to move and reach new areas. Understanding these pathways is the first step to stopping pests before they spread.
Traveling Abroad
When you travel abroad and return from another country, the agricultural items you bring back can introduce new invasive pests into the U.S. and threaten crops or trees that have no natural defenses against them. Even harmless-looking fruit, seed packets or souvenirs made with plant materials can carry pests such as fruit flies and diseases like citrus canker. That’s why it’s critical travelers declare food, plants and other agricultural products when entering the country from abroad.
Shopping Online
Just because you can order seeds and plants from sellers around the world, it doesn’t mean those items are legal or safe to import. In fact, some invasive snails and plant diseases have entered the U.S. this way. Many agricultural products from overseas require permits, inspections or special paperwork before they can enter the country. Buyers should check where an item ships from, learn the import requirements before purchasing and make sure sellers follow all labeling and shipping rules.
 Partaking in Outdoor Activities
When you spend time outdoors hiking, camping, hunting or fishing, you could inadvertently spread invasive species. For example, transporting firewood from one location to another can spread tree-killing insects, such as the emerald ash borer, which can live inside the wood and emerge later in a new area. The safest choice is to buy or use firewood where you burn it. Additionally, clean all outdoor clothing, gear, equipment and vehicles before leaving an area.
Moving Outdoor Equipment
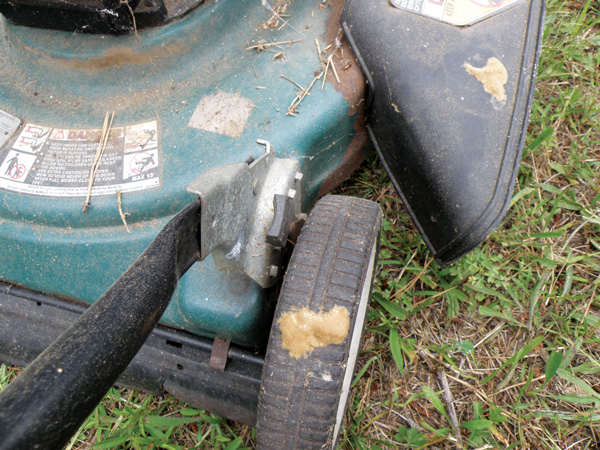
When you move to a new home, your move can create another opportunity for invasive insects to travel. Before relocating patio furniture, grills, trailers or lawn equipment, inspect and clean them carefully. Look for insects, plant debris and egg masses like spotted lanternfly egg masses, which can blend into outdoor surfaces and look like smears of mud or clumps of dirt. A few minutes of checking and cleaning before you move can help prevent pests from invading your new neighborhood.
Invasive pests cost the U.S. billions of dollars every year and damage forests, farms, parks and backyards. Stopping invasive pests starts with simple steps anyone can take: checking what you pack, clean, move and buy. When everyone does their part, fewer pests spread and communities stay healthier and more resilient.
Visit aphis.usda.gov/hungrypests to learn more about how invasive pests spread and the simple steps you can take to help stop them and protect America’s agriculture and natural resources.
Invasive Pest Protection Checklist
- Declare all food, plants and agricultural items when returning from another country.
- When ordering items online, check where the products ship from and verify U.S. import rules before buying.
- If you’re camping, buy firewood where you plan to burn it. Clean clothing, gear and vehicles before leaving.
- Before moving to a new home, inspect outdoor furniture and equipment, looking closely for egg masses or insects.
Content courtesy of USDA.

SOURCE:
United States Department of Agriculture
📰 Enjoying STM Daily News? Join the conversation!
💬 Leave a comment, share your thoughts, and subscribe to our newsletter for the latest stories, updates, and “News You Can Use This Moment!” delivered to your inbox.
Stay connected with STM Daily News!
health and wellness
Heat waves can leave homes dangerously hot – even for young, healthy adults
Heat waves can turn homes into dangerous heat traps—especially during blackouts or in houses without AC—pushing indoor temperatures and humidity into lethal territory even for young, healthy adults, not just the elderly.

Heat waves can leave homes dangerously hot – even for young, healthy adults
Zoltan Nagy, Eindhoven University of Technology
Most people know that heat waves can be dangerous, but what they may not realize is that the heat indoors can be much worse than outdoors.
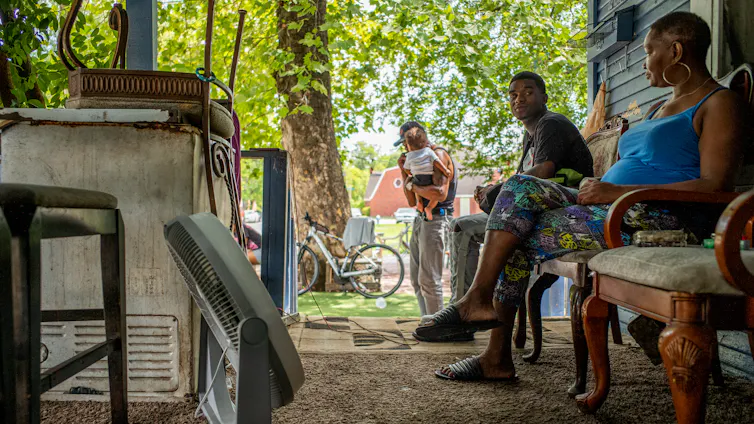
When the power goes out and air conditioning stops, or in homes without cooling, a house starts to function like a greenhouse during a heat wave. Heat enters through windows and walls and has nowhere to go. Air stagnates.
Within hours, indoor temperatures can climb well above what the thermometer shows outside, especially on upper floors and in rooms with south-facing windows. Over longer periods, especially if temperatures don’t cool off overnight, conditions can become lethal.
Most heat-related deaths occur indoors. When a heat dome sent temperatures soaring in the Pacific Northwest in 2021, 98% of the more than 600 deaths in British Columbia happened inside homes. Washington and Oregon also saw high numbers of deaths in homes that lacked air conditioning.
In Europe, where only 1 in 10 households have air conditioning, heat waves killed an estimated 60,000 people in 2022 and 47,000 in 2023, largely inside buildings never designed for these temperatures.
People of all ages are at risk in heat waves like these. I spent eight years at the University of Texas at Austin studying how buildings respond to extreme heat. In a recent study, my team assessed the heat risk in every single-family home in Austin.
We found that even younger, healthy adults face far more risk than they realize.
How hot is too hot for a human body?
Your body maintains a core temperature of about 98.6 degrees Fahrenheit (37 degrees Celsius). To cool down, it pushes blood to the skin and sweats. But when air temperature is high, that convective cooling weakens. When humidity is also high, sweat cannot evaporate.
If the body has no way to release heat, core temperature rises. If the core temperature increases past about 104 F (40 C), the body’s thermoregulation starts to fail. Past 109 F (42.8 C), death becomes likely.

What makes indoor heat especially dangerous is that it does not let up at night in homes that lack air conditioning. Outdoor temperatures typically drop after sunset, and someone outside can get a few hours of recovery. But a poorly insulated home that has been absorbing heat all day releases that heat slowly, keeping indoor temperatures elevated through the night. A person inside the home never gets a break.
After two or three nights of this, even healthy people start to be at serious risk for heat-related illnesses.
Why homes heat up more than people expect
People tend to underestimate indoor heat for a few reasons.
One is that the thermostat typically sits on one wall in one room. It does not tell what the temperature is in an upstairs bedroom or near a sun-facing window. In older, underinsulated homes, the actual felt temperature can exceed 90 F (32.2 C) even when a thermostat reads 75 F (23.9 C). The hot walls, ceilings and windows can radiate heat directly onto your body.
Another reason is that people assume all homes respond to heat the same way. However, a newer home with double-pane windows and good insulation acts like a thermos, keeping heat out for a longer time. An older home with single-pane windows and cracks in the walls heats up fast.
Two houses on the same street, exposed to the same outdoor conditions, can have completely different temperatures inside. And in a blackout, where neither home has cooling, those differences can become a matter of life and death.
What we found in Austin
Our study combined two datasets. From Austin’s tax appraisal records, we pulled basic property information, such as the year the home was built, the size and the number of stories for each of the city’s 213,000 single-family homes. We then matched each home to the most similar energy simulation models in a U.S. Department of Energy database that contains thousands of detailed, physics-based building energy models representing the U.S. residential building stock.
Using those models, we simulated each building’s indoor temperatures over time during a three-day heat wave and power outage with outdoor temperatures above 110 F (43 C).
We found that 85% of homes got hot enough to pose a significant risk of death for an elderly occupant. But what surprised us was the risk to younger people.
Under today’s climate conditions in Austin, about 15% of homes already have the potential to get hot enough without air conditioning to pose serious heat risks to healthy adults. Under future warming scenarios, that number jumps to as high as 65% if average summer highs reach 104 F (40 C). Further, climate projections for Austin show that heat waves will double in frequency by the end of the century.
We found three types of buildings and accompanying risks:
- Resilient homes, which are newer and well insulated, tended to have temperature and humidity conditions that would be survivable for an elderly occupant throughout the simulated heat wave with blackout.
- Critical-risk buildings, which are mostly older homes, became dangerous almost immediately.
- And then there was the middle group – homes where temperatures rose slowly during the simulated blackout, day by day, possibly giving occupants a false sense of security until it was too late.
Texas has already seen conditions like our case study’s – a heat wave paired with a power outage. In 2024, a derecho knocked out power for nearly 900,000 Houston households while the heat index climbed to 100 F (37.8 C). Seven weeks later, Hurricane Beryl cut power to 2.6 million homes, leaving them without power for over three days, with temperatures over 90 F (32.2 C).
What you can do to stay safe
If you can’t get cooling at home, there are steps you can take that can help.
Move to the lowest floor of your home, where it will be coolest. Close the blinds and curtains on sun-facing windows. Drink water constantly to stay hydrated, which is essential for regulating body temperature.
If you’re facing a blackout, be sure to also check on elderly neighbors, especially those living alone. You can also try to find a public cooling center; many cities now open them during heat emergencies.
Longer term, upgrades such as reflective window film, attic insulation and lighter-colored roofing can reduce how much a home heats up. After the 2021 heat dome, British Columbia’s coroner recommended updating building codes to address heat.
Our own findings point in the same direction: We propose that new homes should be required by building codes to maintain conditions in which at least light physical activity remains possible for all occupants for at least 72 hours during a power outage.
As summers get hotter with climate change and blackouts become more frequent, the risks of people suffering heat illnesses will only continue to rise.
Zoltan Nagy, Professor of Building Services, Eindhoven University of Technology
Heat waves can leave homes dangerously hot – even for young, healthy adults
This article is republished from The Conversation under a Creative Commons license. Read the original article.
💪 Your health journey starts here! Explore the latest health news, fitness tips, wellness trends, and healthy living advice. Share your thoughts in the comments and subscribe to the STM Daily News newsletter to stay informed and inspired every day.

(Feature Impact) Relationships and plumbing have something in common: they can both benefit from practicing smarter bathroom habits. Whether you’re sharing a household with your family, a partner or roommates, good etiquette in these frequently shared spaces can save everyone’s sanity – just like rethinking your flushing routines can save your pipes.
From simple annoyances like leaving the toilet seat up to potentially costly mistakes like clogging your plumbing by flushing the wrong items, a new survey from the Responsible Flushing Alliance (RFA) illuminated a variety of bad habits that cause the most tension in American homes.
In addition to shedding light on these problems, the alliance outlined solutions you can implement at home to restore peace in your restroom. Plus, you can gamify the habit changes to make them more entertaining.
“Our goal is to revolutionize public education by keeping it highly engaging, memorable and fun,” RFA President Lara Wyss said. “We are challenging the public to rethink their everyday habits.”
Get started with these seven tips:
 Replace the toilet roll properly
Don’t be the reason someone gets stranded with nothing but a cardboard tube in their moment of need. Keep extra rolls nearby, and when you’re down to the last square of toilet paper, make it a race against the clock to replace it.
Use the (flush) force
An unflushed toilet was listed as the biggest bathroom pet peeve by 37% of survey respondents. To make it fun for the family, introduce a new tradition: before you leave the bathroom, pretend there’s an invisible force field pushing you back to make sure you’ve flushed and are good to go.
Hunt for sink and shower hair
Leaving hair in the drain isn’t just a source of potential plumbing clogs – it’s also an irritant for 35% of respondents. After you shower or style your hair, make it a game to see how many stray strands you can capture and deliver to the trash can.
Clean it and close it
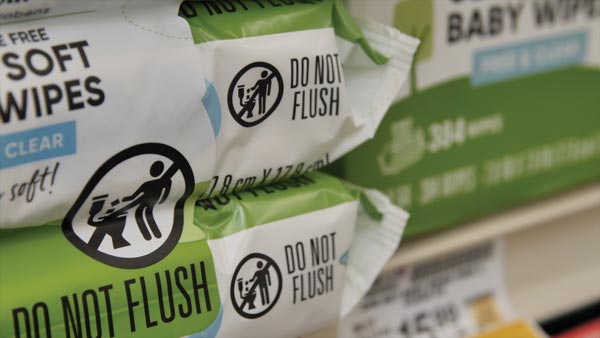
You’ve probably heard jokes about people who leave the toilet seat up, so don’t make yourself the punchline. For a completely un-mockable routine, grab the brush to give the bowl a quick swish after you flush, ensure the seat is down and use an anti-bacterial wipe to leave everything sparkling. You’ll notice cleaning wipes bear the Do Not Flush symbol, which means they go in the trash and never the toilet.
Conquer the counter
Toothpaste and water often splatter all over the place, so to be a polite bathroom roommate, wipe up the mess before it’s even had a chance to dry. Keep cleaning wipes or rags within easy reach and give yourself a 10-second deadline to leave surfaces spotless.
 Practice good towel etiquette
Wet towels don’t belong on bathroom floors. If they still have a use or two left in them, banish them back to your towel rack. Otherwise, challenge yourself to a game of laundry basketball, aiming for the hamper.
Don’t flush the un-flushable
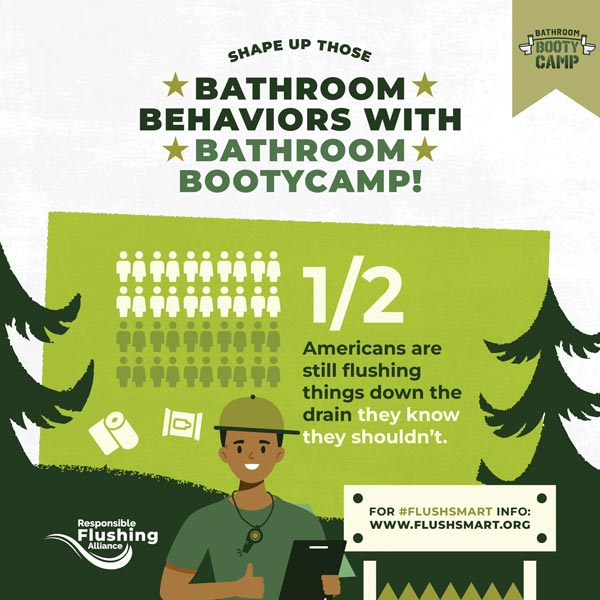
According to an RFA survey, half of Americans are still flushing things they know they shouldn’t, like paper towels, feminine hygiene products and non-flushable wipes. Since clearing a clog in your home can cost anywhere from $300-$15,000 or more, the only thing you’ll be draining with habits like these is your wallet.
“Always check wet wipes for the Do Not Flushsymbol and disposal instructions, which helps us protect not only the health of our homes and environment but our relationships, too,” Wyss said.
Visit FlushSmart.org to learn more about good bathroom etiquette, take an interactive quiz and put these tips into practice with a seven-day challenge.
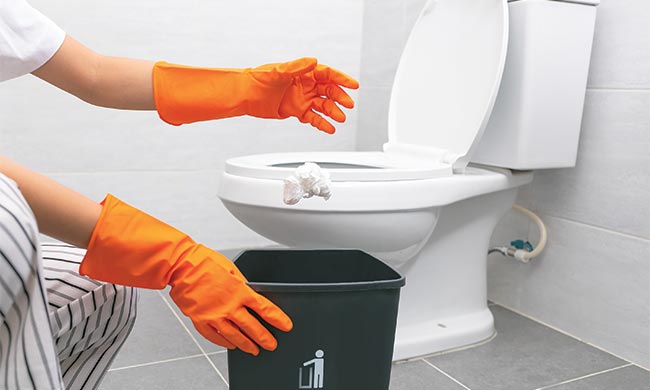
Photo courtesy of Shutterstock (throwing away non-flushable wipe)

SOURCE:
💪 Your health journey starts here! Explore the latest health news, fitness tips, wellness trends, and healthy living advice. Share your thoughts in the comments and subscribe to the STM Daily News newsletter to stay informed and inspired every day.