recipes
Inspired Holiday Entertaining
Holiday Entertaining: The holiday season, while joyful, can be hectic. The KitchenAid Evergreen Design Series adeptly combines style and functionality, enhancing meal preparation. With tools like the Hard-Anodized Ceramic Induction Nonstick Cookware Set and the Tilt-Head Stand Mixer, cooking becomes efficient and enjoyable, fostering connections and cherished memories around the table.

Last Updated on November 17, 2025 by Daily News Staff
(Family Features) The holiday season is a time for creating meals and memories that last a lifetime, but it’s also one of the busiest times of the year. In the blur of commitments, crowded schedules and endless prep, the tension between a desire to create magical meals and wanting to actually enjoy them is real.
The right cookware can help shift that balance. Inspired by the calming essence of the outdoors, the KitchenAid Evergreen Design Series brings a breath of fresh air into the kitchen, blending expressive design with performance that simplifies the season. From durable stockpots to versatile nonstick pans, these tools elevate both prep and presentation.
Inspired Holiday Entertaining
In the middle of the holiday bustle, they provide a sense of calm and control, helping you plan ahead, cut stress and truly savor the moments that matter most. Because the best holiday moments aren’t just about what’s on the table – they’re about the joy you feel when you’re a part of them, from the quiet satisfaction of chopping, stirring and creating to the connection that comes when you share the results with those you love.
Including 12 pieces, the Hard-Anodized Ceramic Induction Nonstick Cookware Set brings the emotive power of nature into the kitchen, elevating your cooking with deep forest-green hues and elegant bronze handles. Ideal for stove-to-oven-to-table cooking, the high-performance ceramic nonstick cookware is eight times harder than traditional aluminum and features thick, forged bases for fast, even heating. Shatter-resistant glass lids seal in heat, lock in flavor and allow easy monitoring.
When you’ll be spending many special evenings around the table during the holiday season, these invaluable tools can help streamline the cooking process whether you need a dish that can be made in advance and frozen for easy entertaining like this Homemade Pumpkin Ravioli with White Wine and Herb Butter Sauce or one that lets you focus on the fun and celebrations even with guests in town such as Butternut Squash Mac and Cheese with Bacon.
If those seasonal recipes call for stirring, whipping or mixing, the KitchenAid Evergreen Design Series Tilt-Head Stand Mixer is up to the task with 10 speeds, a tilt-head design to easily add ingredients and more than 10 different available attachments. Blurring the line between appliance and art through its unique color, finish and walnut wood bowl, it gives makers unmatched potential for creative expression.
Find more recipes and tools to bring culinary inspiration to life during the holidays at kitchenaid.com.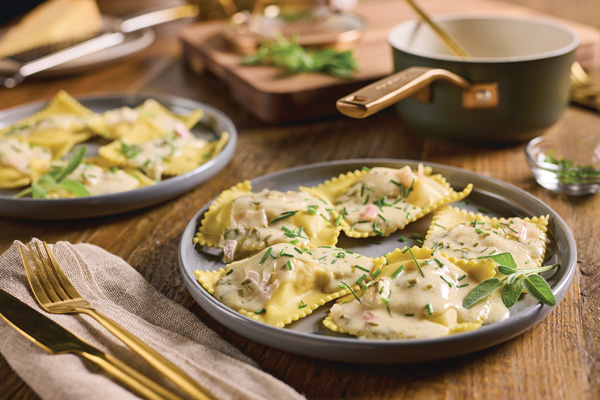
Homemade Pumpkin Ravioli with White Wine and Herb Butter Sauce
Recipe courtesy of Marge Perry and David Bonom
Servings: 4
Ravioli:
- 1 can (15 ounces) pumpkin puree
- 1 large egg, lightly beaten
- 1/3 cup grated Pecorino Romano cheese, plus additional for serving (optional)
- 2 tablespoons plain dried breadcrumbs
- 2 teaspoons sugar
- 1/4 teaspoon salt
- 1 pinch ground nutmeg
- 48 round dumpling wrappers
- water
Sauce:
- 6 tablespoons cold unsalted butter, divided
- 1/3 cup chopped shallots
- 2/3 cup dry white wine
- 3 tablespoons heavy cream
- 2 tablespoons chopped fresh sage
- 1 tablespoon chopped fresh chives
- 1/4 teaspoon salt
- To make ravioli: Line fine mesh sieve with dampened cheesecloth. Add pumpkin puree and strain 1 hour. Transfer to bowl and stir in egg, cheese, breadcrumbs, sugar, salt and nutmeg.
- Arrange six dumpling wrappers on work surface in single layer. Place 1 tablespoon pumpkin mixture in center of each and brush edges with water. Place second wrapper over filling, carefully pushing out any air bubbles then pressing edges to seal.
- Transfer ravioli to baking sheet covered with parchment paper. Place sheet of plastic wrap over ravioli. Repeat with remaining wrappers and filling.
- In KitchenAid Evergreen Design Series 6-Quart Ceramic Stockpot over medium heat, bring salted water to a gentle simmer
- To make sauce: In KitchenAid Evergreen Design Series 3-Quart Ceramic Saucepan over medium-high heat, melt 1 tablespoon butter. Add shallots and cook, stirring occasionally, 1 minute. Add wine, bring to boil and cook until mixture resembles wet sand, 8-9 minutes.
- Reduce heat to medium-low and whisk in remaining butter and heavy cream until melted. Stir in sage, chives and salt; keep warm, stirring occasionally.
- To cook ravioli, add half to simmering water and cook, stirring gently once or twice, 3 minutes. Remove with slotted spoon and divide between two plates. Add remaining ravioli to pot and repeat dividing between remaining plates. Spoon sauce over ravioli and serve with additional grated cheese, if desired.

Butternut Squash Mac and Cheese with Bacon
- 8 ounces elbow macaroni
- 6 slices center-cut bacon
- 1 onion, chopped
- 5 cups butternut squash, cubed
- 3 1/2 cups chicken broth, divided
- 3/4 cup low-fat milk
- 1 teaspoon dry mustard
- 1 pinch nutmeg
- 1 pinch salt, plus additional, to taste, divided
- 1 pinch pepper, plus additional, to taste, divided
- 1 cup Parmesan cheese, grated
- 1 cup sharp cheddar cheese, shredded, divided
- chopped parsley (optional)
- In KitchenAid Evergreen Design Series 6-Quart Ceramic Stockpot, cook macaroni noodles according to package instructions. Set aside.
- In KitchenAid Evergreen Design Series 5-Quart Ceramic Saute Pan, cook bacon until crisp. Chop and set aside.
- In same pan, add chopped onion and cook over low heat, stirring occasionally, until pieces are soft and lightly caramelized.
- Add butternut squash cubes to onions along with 2 cups chicken broth. Cover and bring to boil. Reduce heat and cook until squash is soft and most liquid is reduced.
- Pour squash and onions into bowl and add milk, remaining chicken broth, dry mustard, nutmeg and pinch of salt and pepper. Using KitchenAid Evergreen Design Series Tilt-Head Stand Mixer, puree mixture until smooth and creamy.
- Pour pureed sauce into saute pan. Over low heat, add Parmesan cheese and 3/4 cup sharp cheddar cheese a little at a time, stirring constantly. Add noodles and stir well.
- Add salt and pepper, to taste. Top with chopped bacon, remaining cheese and chopped parsley, if desired.
SOURCE:
KitchenAid
https://stmdailynews.com/the-fate-of-lucky-supermarkets-in-socal/


Food and Beverage
Serve Up Smiles with Favorite Holiday Sides
Turkey and ham may sit centerstage, but classic holiday sides can make the season truly special. You can bring smiles to your loved ones’ faces by dishing out those favorite recipes everyone asks for year after year.
(Family Features) Turkey and ham may sit centerstage, but classic holiday sides can make the season truly special. You can bring smiles to your loved ones’ faces by dishing out those favorite recipes everyone asks for year after year.
Made with a delicious combination of rice, cheddar cheese, cream of mushroom soup and broccoli florets, this quick and easy version of Broccoli and Cheese Rice Casserole is an ideal one-pot dish to keep the holidays simple. With three easy steps and everyday ingredients, it comes together with minimal effort for traditional casserole taste.
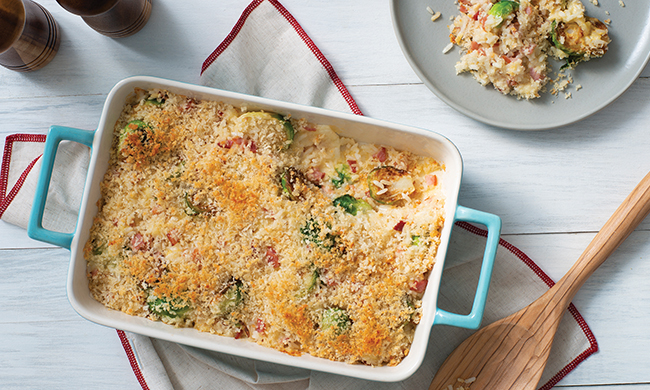
When it comes to feeding a crowd, it’s often best to let your oven do the work. This Brussels Sprouts and Ham Rice Gratin recipe allows you to serve up a filling favorite with little effort using pantry staples. Plus, it’s a kid-friendly way to encourage veggies at this year’s holiday meal with gooey cheese providing tempting taste bud motivation.
These seasonal classics and more are made quick and easy with an option like Success Boil-in-Bag Rice, a pre-measured, mess-free way to make fluffy, high-quality rice. It’s cooked by simply dropping a bag of rice in a pot of water or broth then boiling it for 10 minutes. BPA-free and FDA-approved, the bags are safe to use and made to withstand high temperatures.
An added bonus: If you’re aiming to achieve a particular flavor, just season the rice by cooking in water infused with herbs, spices, broth, coconut milk or other liquids like juice for sweeter recipes.
Visit SuccessRice.com to find more holiday recipe inspiration.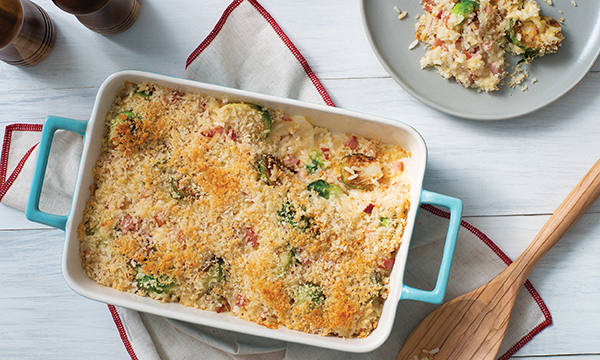
Brussels Sprouts and Ham Rice Gratin
Prep time: 20 minutes
Cook time: 25 minutes
Servings: 4
- 1 bag Success White Rice
- 1/2 pound Brussels sprouts, trimmed and halved
- 1/3 cup diced ham
- 1 clove garlic, minced
- 1 tablespoon olive oil
- 3/4 teaspoon salt, divided
- 3/4 teaspoon black pepper, divided
- 1 cup heavy cream
- 2 tablespoons finely chopped fresh chives
- 2 tablespoons Dijon mustard
- 1 cup shredded sharp cheddar cheese
- 1/2 cup grated Parmesan cheese, divided
- 1/3 cup breadcrumbs
- 2 tablespoons butter, melted
- Preheat oven to 450 F. Prepare rice according to package directions.
- In large bowl, toss Brussels sprouts, ham, garlic, olive oil, 1/4 teaspoon salt and 1/4 teaspoon pepper. Place on parchment paper-lined baking tray and roast 12-15 minutes, or until caramelized. Decrease oven temperature to 425 F.
- In large bowl, toss rice, Brussels sprouts mixture, cream, chives, Dijon mustard, remaining salt and remaining pepper. Stir in cheddar and 1/3 cup Parmesan cheese. Transfer mixture to greased, 2-quart baking dish.
- In small bowl, stir breadcrumbs, remaining Parmesan and melted butter. Sprinkle over rice mixture.
- Bake 12-15 minutes, or until golden brown and bubbling.
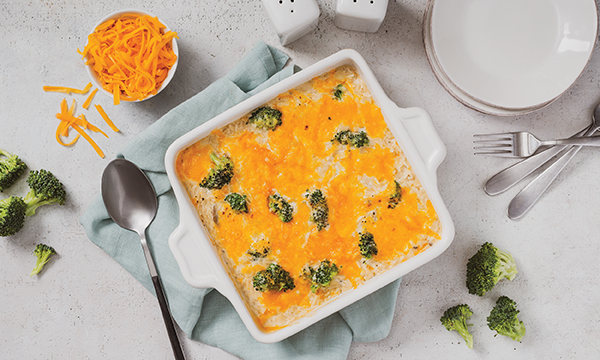
Broccoli and Cheese Rice Casserole
Prep time: 5 minutes
Cook time: 30 minutes
Servings: 4-6
- 1 bag Success White Rice or Brown Rice
- nonstick cooking spray
- 1 can (10 3/4 ounces) condensed cream of mushroom soup
- 2 cups frozen broccoli florets, thawed and drained
- 1 1/2 cups shredded cheddar cheese, divided
- 1/2 cup evaporated milk
- 3 tablespoons butter, melted
- 1 tablespoon grated onion
- 1/2 teaspoon salt
- 1/2 teaspoon black pepper
- Prepare rice according to package directions. Preheat oven to 350 F.
- Coat 2-quart casserole dish with nonstick cooking spray. In medium bowl, combine soup, broccoli, 1 cup cheddar cheese, evaporated milk, butter, onion, salt and pepper. Fold in rice.
- Pour mixture into prepared dish and top with remaining cheddar cheese. Bake 20 minutes.
SOURCE:
Success Rice
At our core, we at STM Daily News, strive to keep you informed and inspired with the freshest content on all things food and beverage. From mouthwatering recipes to intriguing articles, we’re here to satisfy your appetite for culinary knowledge.
Visit our Food & Drink section to get the latest on Foodie News and recipes, offering a delightful blend of culinary inspiration and gastronomic trends to elevate your dining experience.
https://stmdailynews.com/category/food-and-beverage
You can also find food and beverage-related videos on our YouTube channel, where we regularly post new content and share tips, recipes, and demonstrations. https://youtube.com/playlist?list=PLEhXBupt8tVynuUhpQZMxQt4lvPmOiAtQ&si=InDwc7YaB0KIwmxy

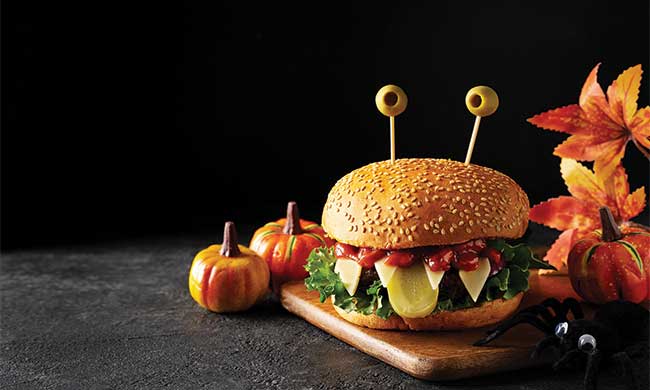
(Feature Impact) Out with the ordinary, in with the weird – that’s what the Halloween season is all about. These Halloween Monster Burgers give a ghoulishly fun twist on burger night, featuring all your favorite toppings transformed into olive eyes, cheese fangs and a pickle tongue.
Whether you reach for a traditional hamburger patty or switch it up with chicken, turkey, bean or veggie options, the effect is the same: a dinner that looks like it escaped from a mad scientist’s lab. It’s a good way to get some protein and veggies into kids before the trick-or-treating sugar rush, and you can even make it interactive by inviting them to decorate their own monsters and come up with creative variations.
Alternatively, if you’re looking for some spooky hors d’oeuvres to impress at this year’s Halloween party, these burgers are easy to size down into slider form. Serve a whole tray of mini monsters ready to devour – or be devoured by – hungry guests.
Find more Halloween recipe inspiration at Culinary.net.

Halloween Monster Burgers
Recipe adapted from Happy Foods Tube
Prep time: 10 minutes
Total time: 18 minutes
Servings: 4
- 4 hamburger, chicken or veggie patties
- 4 tablespoons mayonnaise
- 4 teaspoons ketchup, plus additional, to taste, divided
- 4 hamburger buns
- 8 leaves baby romaine lettuce
- 4 slices dill pickles, sliced lengthwise
- 4 cheese slices
- 8 large green olives, pits removed
- Cook burger patties until they reach desired doneness.
- In small bowl, combine mayonnaise and 4 teaspoons ketchup. Spread each bun base with about 1 tablespoon mayo sauce then add two lettuce leaves and cooked burger patty.
- Add pickle slice as monster “tongue.” Take each cheese slice and cut triangles into one side to resemble teeth; add to burger then cover with ketchup “blood,” to taste.
- Stick olives on toothpicks and add two to each top bun as “eyeballs.”
Photo courtesy of Shutterstock

SOURCE:
Food and Beverage
4 Ways to Enjoy Fresher Foods at Home
Fresher Foods at Home: Knowing your food was grown from the earth and nurtured by the sun and rain can add a whole new dimension of enjoyment to your meals, which processed foods often can’t replicate. Recipes like these Chicken and Avocado Rollups can be an easy solution for putting fresh foods like avocados on the menu.
4 Ways to Enjoy Fresher Foods at Home
(Feature Impact) Fresh fruits and vegetables add color, nourishment and satisfaction to life. Knowing your food was grown from the earth and nurtured by the sun and rain can add a whole new dimension of enjoyment to your meals, which processed foods often can’t replicate.
However, if you’ve ever bought a cart full of produce with the best intentions – only to watch as half of it goes bad before you’ve managed to use it – you aren’t alone. Eating fresh foods is often easier in your healthy-eating dreams than in reality. With small habit changes, though, you can transform your household into a place where fresh, whole-food ingredients are at the center of your daily routines.
Consider these suggestions from the fresh produce experts at Avocados from Colombia.
Shop with a Plan
Meal-planning before you shop can help ensure every ingredient you buy has a purpose within its shelf life. Instead of picking out fruits and vegetables with vague aspirations of figuring out something to do with them later, you can simply consult your list and remember you need peppers, onions and avocados for that breakfast burrito recipe you want to try.
Pay Attention to Where Food Comes From
The source of your food can make a big difference in its freshness. When produce is grown and harvested with care then shipped quickly to its destination, it preserves quality and simplifies the journey from the farm to your table.
Consider fresh fruits like Avocados from Colombia, which aren’t just grown but raised at high altitude in rich volcanic soil, nourished by mountain rain and harvested by the hands of growers who care about their land and their craft. The fruit reaches U.S. shipping ports in as little as 3-5 days, so you can confidently choose flavorful produce that arrives as fresh as possible from beautiful Colombian orchards.
With two harvest seasons across nine growing regions, fresh Colombian avocados can be enjoyed throughout the entire year, whether you want to serve bright guacamole or dice an avocado as a cool, creamy topping for a warm winter chili.
Use Fresh Ingredients in a Variety of Ways
It’s always easier to use fresh ingredients when you’re brimming with ideas of things to do with them. For instance, avocados can be transformed into guacamole, creamy salad dressing or flavorful sauces; sliced for use in grain bowls, salads or avocado toast; or frozen to blend into smoothies. This also makes it easier to buy produce in bulk or take advantage of sales.
Find Inspiration Online
Recipes like these Chicken and Avocado Rollups can be an easy solution for putting fresh avocados on the menu, offering the type of everyday joy the growers behind Avocados from Colombia hope you taste. Their new “Raised by Colombia” short film puts faces to that idea, following Don Hernando, a grower of 40 harvests, and his granddaughter Camila, who brought the science of growing home. It ends where your avocado does: at a family table, where the grandmother of the house serves it in a kitchen like yours.
To watch the film and discover more recipe ideas, visit AvocadosColombia.com/RaisedByColombia.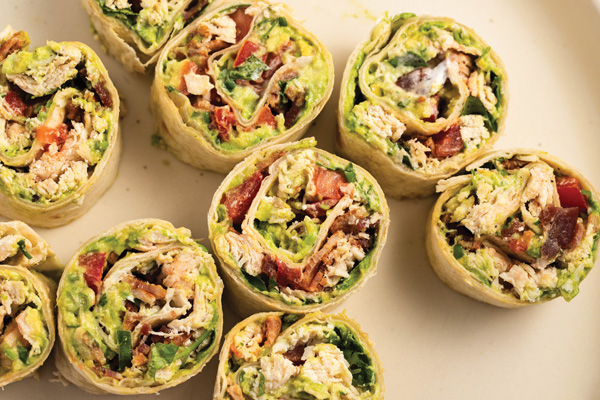
Chicken and Avocado Rollups
Recipe courtesy of Avocados from Colombia
Total time: 20 minutes
Servings: 5-6
- 2 tablespoons mayo
- 2 tablespoons sour cream
- 1 tablespoon lime juice
- 3 large flour tortillas, warmed
- 1 large avocado, smashed
- 2 Roma tomatoes, diced
- 1/4 cup red onion, diced
- 3 tablespoons cilantro, chopped
- 1 cup cooked chicken breast
- 6 slices bacon, cooked and crumbled
- salt, to taste
- pepper, to taste
- In small bowl, mix mayo, sour cream and lime juice.
- Place tortilla on flat service and spread with lime crema followed by smashed avocado.
- Layer with tomatoes, red onion, cilantro, chicken and bacon. Season with salt and pepper, to taste.
- Roll tortilla into tube shape and cut into pieces. Repeat with remaining tortillas and fillings.
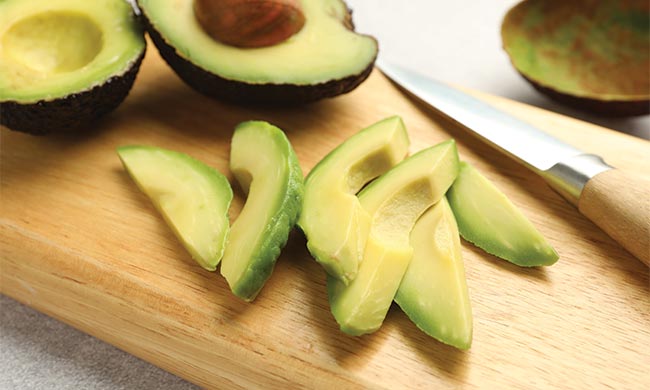
Photo courtesy of Shutterstock (avocado on cutting board)
SOURCE: