Recipe of the Week
Boost Morning Brainpower with Loaded Avocado Toast

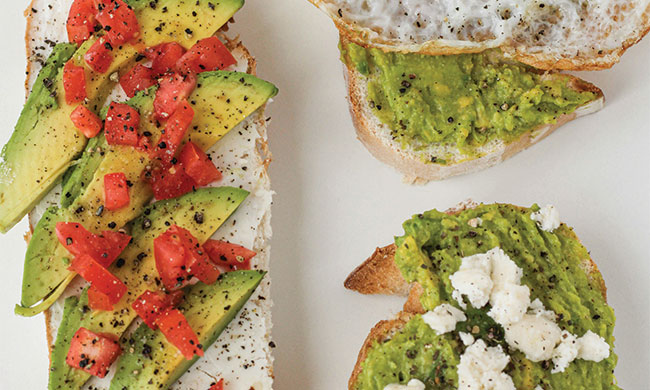
(Feature Impact) Avocado toast has a reputation for popularity among millennials, but its versatility and nutritional benefits make it easy for people of all ages to enjoy. Whether you’re fueling up before work or getting kids ready for school, this Loaded Avocado Toast can help the whole household start the morning right.
The healthy fats and vitamins in avocado have been linked to cognitive benefits, while the addition of cannellini beans boosts fiber and protein to keep you feeling full. Choose whole-grain or sourdough bread to build a balanced breakfast with a nutritious base.
Toppings are easy to mix and match however you want so every person at the breakfast table can enjoy their own unique slice. Whether you stick to the recipe – piling on nutritious hemp hearts, diced tomatoes and eggs – or come up with a different combination like smoked salmon with pickled red onions, you can’t go wrong.
Discover more recipes for breakfast and beyond at Culinary.net.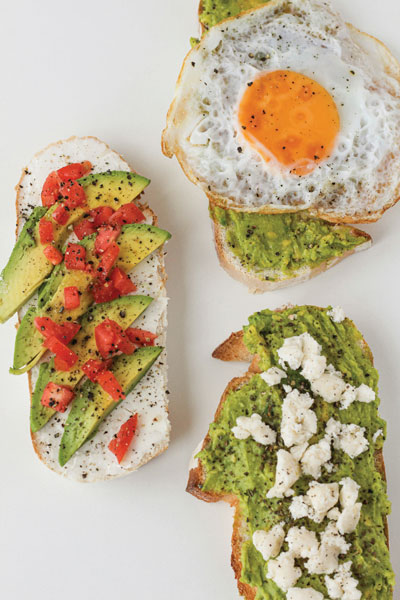
Loaded Avocado Toast
Recipe adapted from What’s Gaby Cooking
Total time: 10 minutes
Servings: 2
- 2 pieces thick-cut bread
- 1 large ripe avocado
- 1/2 cup canned cannellini beans, drained and rinsed
- 1 tablespoon freshly squeezed lemon juice
- kosher salt, to taste
- freshly cracked black pepper, to taste
- 1 tablespoon hemp hearts
- 1/2 cup diced cherry tomatoes
- 1 tablespoon olive oil
- 1/2 tablespoon red wine vinegar
- 1 tablespoon chopped fresh basil
- 2 eggs
- hot sauce or red pepper flakes (optional)
- Toast bread until golden brown, 2-3 minutes.
- Halve avocado, remove pit and scoop flesh into medium bowl. Add cannellini beans and lemon juice then mash ingredients together with fork. Season with salt and pepper, to taste. Spread mash on toast and sprinkle with hemp hearts.
- In small bowl, toss diced tomatoes, olive oil, vinegar and basil. Pile on avocado toast.
- Prepare eggs as desired. Add one egg to each slice.
- Add hot sauce or red pepper flakes, if desired.

SOURCE:
Culinary.net
Read more in our Food & Drink section on STM Daily News


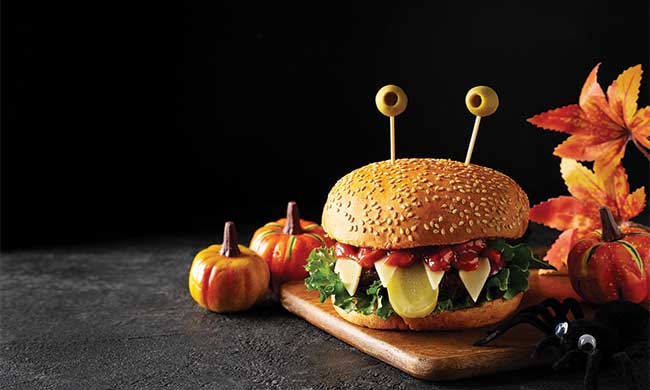
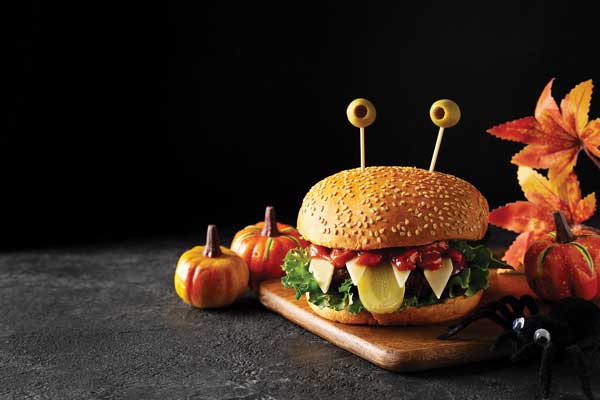
(Feature Impact) Out with the ordinary, in with the weird – that’s what the Halloween season is all about. These Halloween Monster Burgers give a ghoulishly fun twist on burger night, featuring all your favorite toppings transformed into olive eyes, cheese fangs and a pickle tongue.
Whether you reach for a traditional hamburger patty or switch it up with chicken, turkey, bean or veggie options, the effect is the same: a dinner that looks like it escaped from a mad scientist’s lab. It’s a good way to get some protein and veggies into kids before the trick-or-treating sugar rush, and you can even make it interactive by inviting them to decorate their own monsters and come up with creative variations.
Alternatively, if you’re looking for some spooky hors d’oeuvres to impress at this year’s Halloween party, these burgers are easy to size down into slider form. Serve a whole tray of mini monsters ready to devour – or be devoured by – hungry guests.
Find more Halloween recipe inspiration at Culinary.net.
Halloween Monster Burgers
Recipe adapted from Happy Foods Tube
Prep time: 10 minutes
Total time: 18 minutes
Servings: 4
- 4 hamburger, chicken or veggie patties
- 4 tablespoons mayonnaise
- 4 teaspoons ketchup, plus additional, to taste, divided
- 4 hamburger buns
- 8 leaves baby romaine lettuce
- 4 slices dill pickles, sliced lengthwise
- 4 cheese slices
- 8 large green olives, pits removed
- Cook burger patties until they reach desired doneness.
- In small bowl, combine mayonnaise and 4 teaspoons ketchup. Spread each bun base with about 1 tablespoon mayo sauce then add two lettuce leaves and cooked burger patty.
- Add pickle slice as monster “tongue.” Take each cheese slice and cut triangles into one side to resemble teeth; add to burger then cover with ketchup “blood,” to taste.
- Stick olives on toothpicks and add two to each top bun as “eyeballs.”
Photo courtesy of Shutterstock

SOURCE:
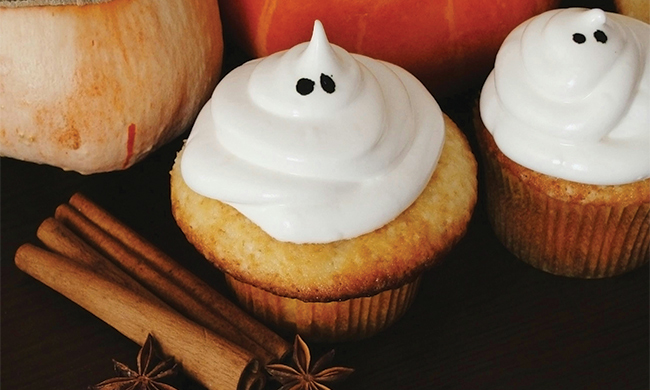
(Feature Impact) Fall flavors and Halloween decorations make an ideal seasonal combination. These Cinnamon Spiced Ghost Cupcakes are the perfect example, with the warmth and sweetness of the cake offering a tasty base for piles of frightful frosting. All it takes to transform a swirl of white buttercream into a spooky ghost is a couple dots of food coloring, chocolate chips or another candy of choice.
They’re simple to make, easy to personalize and fun for all ages, whether you’re baking a tray for kids to decorate or bringing them to a Halloween party. Add sprinkles, a dusting of cinnamon or decorations that fit your theme.
Find more seasonal recipes to enjoy at Culinary.net.

Cinnamon Spiced Ghost Cupcakes
Recipe adapted from The Marble Kitchen
Prep time: 20 minutes
Cook time: 16 minutes
Servings: 12
- 1 1/4 cups all-purpose flour
- 3/4 teaspoon baking powder
- 2 teaspoons ground cinnamon
- 1/2 teaspoon kosher salt
- 6 tablespoons unsalted butter, at room temperature
- 1/2 cup granulated sugar
- 1/4 cup brown sugar
- 1 egg, at room temperature
- 3/4 cup milk
- 1 teaspoon vanilla extract
Vanilla Buttercream Frosting:
- 1 cup unsalted butter, at room temperature
- 1/2 teaspoon salt
- 4 cups powdered sugar, sifted
- 3-5 tablespoons heavy cream, at room temperature
- 1 tablespoon vanilla extract
- black food dye or chocolate chips
- Preheat oven to 350 F and line cupcake pan with paper liners.
- In medium bowl, combine flour, baking powder, cinnamon and salt.
- Using electric or stand mixer, cream butter, sugar and brown sugar about 4 minutes on medium or medium-high speed until light and fluffy. Add egg, mixing well and scraping down bowl.
- In small bowl or measuring cup, whisk milk and vanilla. Set aside.
- Add 1/3 dry ingredient mixture to butter mixture and beat until combined. Add 1/2 milk mixture and mix well. Continue alternating dry and wet ingredients.
- Bake about 16 minutes, or until toothpick inserted in middle of cupcake comes out clean. Cool in pan 5 minutes then transfer to wire rack to cool completely before frosting.
- To make frosting: Using electric or stand mixer, beat butter and salt on medium-high speed 5 minutes, scraping down bowl halfway through.
- Reduce speed to low and add sugar 1/2 cup at a time, alternating with heavy cream until 3 tablespoons have been added. Stop occasionally to scrape down bowl. Once all sugar is in, add vanilla and beat on medium-low 1 minute until light and fluffy. If desired, add additional cream 1 teaspoon at a time until frosting reaches preferred consistency.
- Place buttercream in piping bag with large round tip. Pipe tall mounds of frosting on each cupcake in ghost shapes (wider on bottom, narrower on top). Add dots of black food dye or chocolate chips for eyes.
Photo courtesy of Unsplash

SOURCE:
(Feature Impact) Game day is about more than the big plays, touchdown-saving tackles and final score. Whether you’re gathering in the stadium parking lot or hosting friends for an at-home watch party, a memorable experience begins long before kickoff.
Start your pregame festivities with an MVP-worthy spread that’s simple to serve, easy to eat and keeps fans full through the final whistle. For example, the flavor of Buffalo is a game-day staple, but wings aren’t the only way to enjoy it.
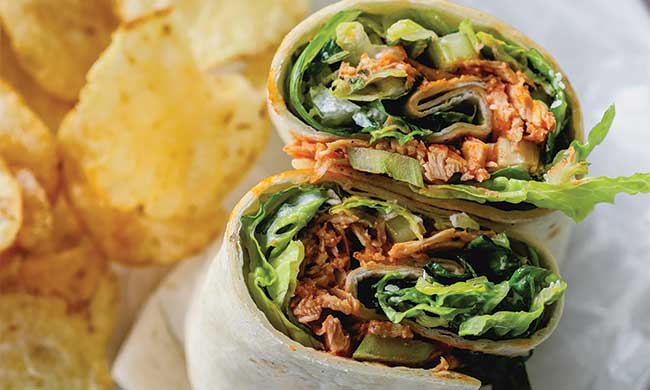
For less mess, Buffalo Chicken Caesar and Celery Wraps pair convenience with the cool crunch of Dandy Celery, a year-round superstar ingredient for many of your favorite football-inspired dishes. It’s packed with flavor and low in calories, making it a smart choice for snacking.
The contrasting tastes and textures offer a satisfying bite, whether you slice the wraps into smaller portions for appetizer-style serving or leave them whole for fans with hearty appetites.
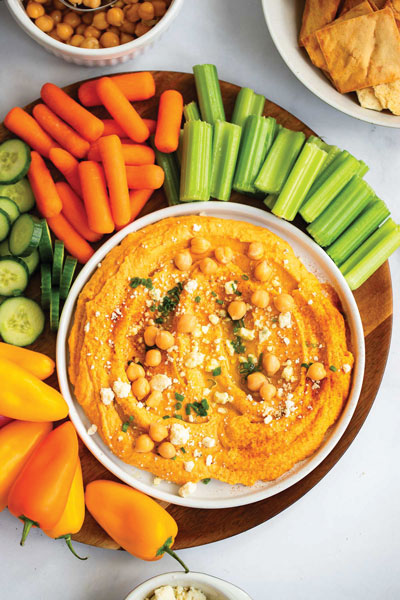
Nervous nibblers during the game’s most tense moments may prefer a lighter bite, and that’s where a dependable dip can come through in the clutch. This Buffalo Hummus recipe puts a tailgate-spin on the familiar favorite, combining creamy texture with a little heat.
Serve it alongside crackers, chips or crisp vegetables like Dandy celery dippers, fresh-cut celery sticks that are pre-washed and ready to eat at your convenience – a true time-saver when the clock is ticking.
Design your own winning game plan by finding more tailgating recipes at DudaFresh.com.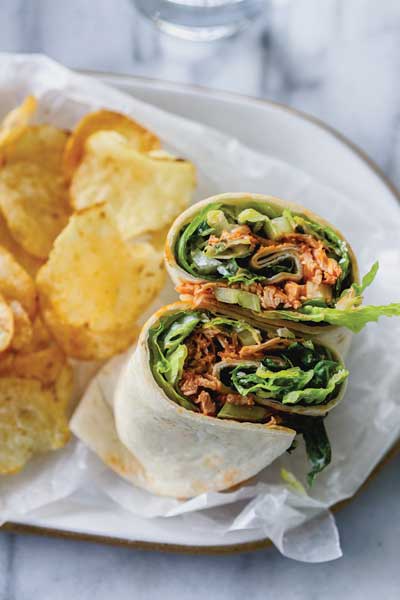
Buffalo Chicken Caesar and Celery Wraps
Servings: 4
- 2 cups shredded rotisserie chicken
- 1/4 cup Buffalo sauce
- 2 cups Dandy romaine hearts, chopped
- 1 cup Dandy celery, chopped (about 4 ribs)
- 1/3 cup Caesar dressing
- 1/4 cup grated Parmesan cheese
- 1/2 teaspoon black pepper
- 4 large flour tortillas (10 inches)
- In bowl, toss shredded chicken with Buffalo sauce. Set aside.
- To make salad: In separate bowl, combine romaine, celery, Caesar dressing, Parmesan cheese and black pepper. Mix well.
- To assemble wraps: Spoon about 1/4 cup Buffalo chicken along center of each tortilla, leaving small border at each end; top with Caesar salad. Fold up bottom of tortilla over filling then fold in sides and roll up tightly. Slice in half diagonally.
Buffalo Hummus
Prep time: 5 minutes
Servings: 8
- 1 can (15 ounces) chickpeas, drained and rinsed
- 1/4 cup tahini
- 1/4 cup Buffalo sauce
- 2 tablespoons olive oil
- 1/2 lemon, juice only
- 2 cloves garlic
- 2-3 tablespoons ice water
- dairy-free blue cheese, for garnish (optional)
- chopped chives, for garnish (optional)
- paprika, for garnish (optional)
- olive oil, for garnish (optional)
- Dandy Celery Dippers
- pita chips
- In food processor, puree drained chickpeas, tahini, Buffalo sauce, olive oil, lemon juice and garlic until smooth, stopping to scrape down sides as needed. Add water through lid until desired consistency is achieved.
- Spread hummus onto serving plate or bowl. Garnish, if desired, with dairy-free blue cheese, chopped chives, paprika and drizzle of olive oil. Serve with celery dippers and pita chips.

SOURCE: