Food and Beverage
Oven-Baked Hash Brown Potatoes — Crispy & Flavorful Every Time
Learn how to make crispy oven-baked hash brown potatoes with simple ingredients. A golden, easy breakfast or brunch side dish ready in under 40 minutes.

Last Updated on March 7, 2026 by Daily News Staff

Oven-Baked Hash Brown Potatoes
If you love golden, crispy hash browns without the grease of a skillet, this oven-baked version delivers all the flavor with less fuss. Perfect for breakfast, brunch, or as a comforting side, these potatoes turn out crispy on the outside and tender on the inside — every time.
Ingredients
- 3 cups shredded potatoes (fresh or frozen — thawed & squeezed dry)
- 2–3 tablespoons olive oil or melted butter
- ½ teaspoon sea salt
- ¼ teaspoon black pepper
- Optional add-ins: garlic powder, onion powder, paprika, shredded cheese
Instructions
1. Preheat the Oven
Heat your oven to 425°F (220°C). Line a baking sheet with parchment paper or lightly grease with oil.
2. Prep the Potatoes
- Fresh potatoes: Rinse shredded potatoes under cold water, then squeeze out as much moisture as possible using a clean kitchen towel.
- Frozen hash browns: Thaw completely and press dry before seasoning.
Getting the water out is the secret to crispy hash browns!
3. Season & Toss
In a large bowl, combine the drained potatoes with olive oil (or melted butter), salt, pepper, and any optional seasonings like garlic powder or paprika.
4. Spread & Bake
Spread the potatoes in a thin, even layer on the baking sheet. For patties, press small mounds into rounds.
Bake for 18–25 minutes, then use a spatula to flip. Continue baking another 10–15 minutes until the edges are perfectly golden brown.
5. Serve & Enjoy
Once crisp and golden, transfer to a plate, add your favorite toppings — think sour cream, chives, or cheese — and serve hot.
Pro Tips for Perfect Crispiness
- Dry is key: The drier the potatoes, the crispier they get.
- Don’t crowd the pan: Give them space so they roast, not steam.
- High heat wins: 425°F ensures a crunchy outside and a tender inside.
Serving Suggestions
These hash browns pair beautifully with:
- Eggs any style
- Grilled sausages or bacon
- Avocado and salsa for a breakfast bowl twist
- A dollop of Greek yogurt or sour cream
If you enjoyed this recipe, check out more comfort classics and kitchen tips right here on STM Daily News.
More Hash Brown Recipes You”ll Love
🍽️ Happy cooking from STM Daily News!


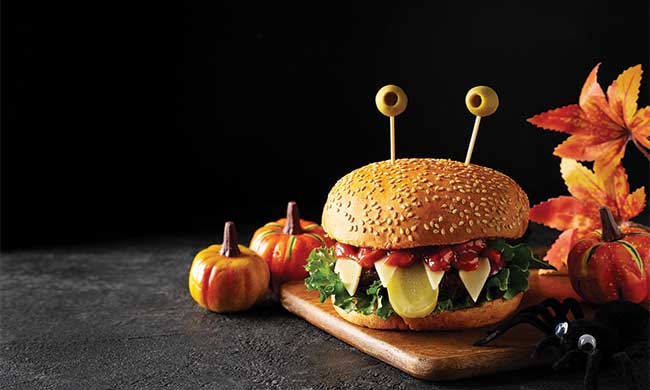
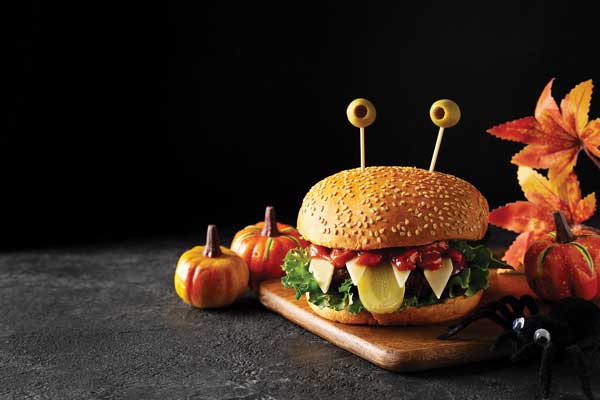
(Feature Impact) Out with the ordinary, in with the weird – that’s what the Halloween season is all about. These Halloween Monster Burgers give a ghoulishly fun twist on burger night, featuring all your favorite toppings transformed into olive eyes, cheese fangs and a pickle tongue.
Whether you reach for a traditional hamburger patty or switch it up with chicken, turkey, bean or veggie options, the effect is the same: a dinner that looks like it escaped from a mad scientist’s lab. It’s a good way to get some protein and veggies into kids before the trick-or-treating sugar rush, and you can even make it interactive by inviting them to decorate their own monsters and come up with creative variations.
Alternatively, if you’re looking for some spooky hors d’oeuvres to impress at this year’s Halloween party, these burgers are easy to size down into slider form. Serve a whole tray of mini monsters ready to devour – or be devoured by – hungry guests.
Find more Halloween recipe inspiration at Culinary.net.
Halloween Monster Burgers
Recipe adapted from Happy Foods Tube
Prep time: 10 minutes
Total time: 18 minutes
Servings: 4
- 4 hamburger, chicken or veggie patties
- 4 tablespoons mayonnaise
- 4 teaspoons ketchup, plus additional, to taste, divided
- 4 hamburger buns
- 8 leaves baby romaine lettuce
- 4 slices dill pickles, sliced lengthwise
- 4 cheese slices
- 8 large green olives, pits removed
- Cook burger patties until they reach desired doneness.
- In small bowl, combine mayonnaise and 4 teaspoons ketchup. Spread each bun base with about 1 tablespoon mayo sauce then add two lettuce leaves and cooked burger patty.
- Add pickle slice as monster “tongue.” Take each cheese slice and cut triangles into one side to resemble teeth; add to burger then cover with ketchup “blood,” to taste.
- Stick olives on toothpicks and add two to each top bun as “eyeballs.”
Photo courtesy of Shutterstock

SOURCE:
Food and Beverage
4 Ways to Enjoy Fresher Foods at Home
Fresher Foods at Home: Knowing your food was grown from the earth and nurtured by the sun and rain can add a whole new dimension of enjoyment to your meals, which processed foods often can’t replicate. Recipes like these Chicken and Avocado Rollups can be an easy solution for putting fresh foods like avocados on the menu.

4 Ways to Enjoy Fresher Foods at Home
(Feature Impact) Fresh fruits and vegetables add color, nourishment and satisfaction to life. Knowing your food was grown from the earth and nurtured by the sun and rain can add a whole new dimension of enjoyment to your meals, which processed foods often can’t replicate.
However, if you’ve ever bought a cart full of produce with the best intentions – only to watch as half of it goes bad before you’ve managed to use it – you aren’t alone. Eating fresh foods is often easier in your healthy-eating dreams than in reality. With small habit changes, though, you can transform your household into a place where fresh, whole-food ingredients are at the center of your daily routines.
Consider these suggestions from the fresh produce experts at Avocados from Colombia.
Shop with a Plan
Meal-planning before you shop can help ensure every ingredient you buy has a purpose within its shelf life. Instead of picking out fruits and vegetables with vague aspirations of figuring out something to do with them later, you can simply consult your list and remember you need peppers, onions and avocados for that breakfast burrito recipe you want to try.
Pay Attention to Where Food Comes From
The source of your food can make a big difference in its freshness. When produce is grown and harvested with care then shipped quickly to its destination, it preserves quality and simplifies the journey from the farm to your table.
Consider fresh fruits like Avocados from Colombia, which aren’t just grown but raised at high altitude in rich volcanic soil, nourished by mountain rain and harvested by the hands of growers who care about their land and their craft. The fruit reaches U.S. shipping ports in as little as 3-5 days, so you can confidently choose flavorful produce that arrives as fresh as possible from beautiful Colombian orchards.
With two harvest seasons across nine growing regions, fresh Colombian avocados can be enjoyed throughout the entire year, whether you want to serve bright guacamole or dice an avocado as a cool, creamy topping for a warm winter chili.
Use Fresh Ingredients in a Variety of Ways
It’s always easier to use fresh ingredients when you’re brimming with ideas of things to do with them. For instance, avocados can be transformed into guacamole, creamy salad dressing or flavorful sauces; sliced for use in grain bowls, salads or avocado toast; or frozen to blend into smoothies. This also makes it easier to buy produce in bulk or take advantage of sales.
Find Inspiration Online
Recipes like these Chicken and Avocado Rollups can be an easy solution for putting fresh avocados on the menu, offering the type of everyday joy the growers behind Avocados from Colombia hope you taste. Their new “Raised by Colombia” short film puts faces to that idea, following Don Hernando, a grower of 40 harvests, and his granddaughter Camila, who brought the science of growing home. It ends where your avocado does: at a family table, where the grandmother of the house serves it in a kitchen like yours.
To watch the film and discover more recipe ideas, visit AvocadosColombia.com/RaisedByColombia.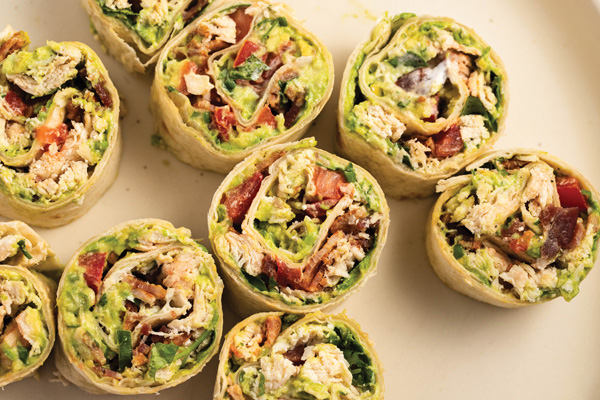
Chicken and Avocado Rollups
Recipe courtesy of Avocados from Colombia
Total time: 20 minutes
Servings: 5-6
- 2 tablespoons mayo
- 2 tablespoons sour cream
- 1 tablespoon lime juice
- 3 large flour tortillas, warmed
- 1 large avocado, smashed
- 2 Roma tomatoes, diced
- 1/4 cup red onion, diced
- 3 tablespoons cilantro, chopped
- 1 cup cooked chicken breast
- 6 slices bacon, cooked and crumbled
- salt, to taste
- pepper, to taste
- In small bowl, mix mayo, sour cream and lime juice.
- Place tortilla on flat service and spread with lime crema followed by smashed avocado.
- Layer with tomatoes, red onion, cilantro, chicken and bacon. Season with salt and pepper, to taste.
- Roll tortilla into tube shape and cut into pieces. Repeat with remaining tortillas and fillings.
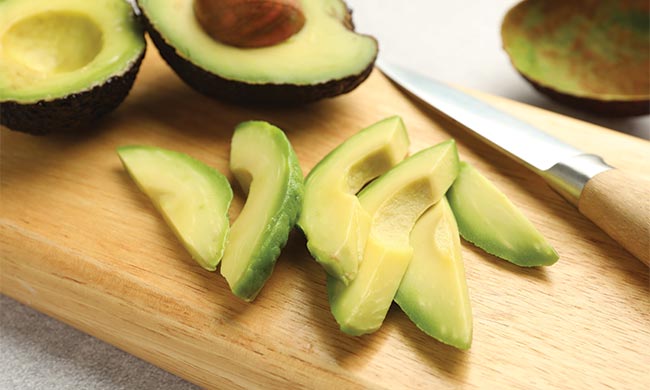
Photo courtesy of Shutterstock (avocado on cutting board)
SOURCE:
recipes
Keeping the Love of Food with Type 2 Diabetes
Living with Type 2 diabetes often means making adjustments to your daily routine, especially when it comes to food. Although adjusting to life with diabetes may take time, you don’t have to give up your favorite foods and flavors. In fact, it can be an opportunity to discover meals that support your health goals while still enjoying the foods you love.
(Feature Impact) Living with Type 2 diabetes often means making adjustments to your daily routine, especially when it comes to food. Whether you’re living with the condition or supporting someone who is, it can influence everything from meal planning to dinners out and everyday activities. Although adjusting to life with diabetes may take time, you don’t have to give up your favorite foods and flavors. In fact, it can be an opportunity to discover meals that support your health goals while still enjoying the foods you love.
That’s what professional chef and TV show host Kardea Brown did, alongside her husband Bryon Smith, who was recently diagnosed with Type 2 diabetes at age 38.
 “When my husband was diagnosed with Type 2 diabetes, it didn’t mean the end of the foods we love,” Brown said. “It meant I had to get creative. I started reimagining my recipes, so they still carry that same soul, that same comfort, just with ingredients that love him back a little better.”
To remove the guesswork about how certain ingredients affect Smith’s glucose levels, the couple relies on Abbott’s FreeStyle Libre 3 Plus sensor with Libre Assist*, a feature within the accompanying Libre app**. The technology provides real-time glucose insights and can help predict how certain foods may affect his glucose^ levels before a meal.
“I open the Libre Assist feature in the app, snap a photo and instantly see how that food might affect me before I even take the first bite,” Smith said. “It even suggests healthier swaps to help lower the impact.”
Small lifestyle changes can also make a difference in diabetes management. Brown recommends:
- Building balanced meals that prioritize non-starchy vegetables, lean proteins and healthy carbs for added fiber.
- Reading labels carefully to ensure you choose ingredients with little or no added sugars.
- Boosting fiber intake with ingredients like lentils, oats, beans and whole fruits.
- Cooking smarter at home by using simple methods like grilling, baking or sauteing with healthy fats, such as olive or canola oil.
- Planning and preparing for success by shopping with a list and planning meals in advance so you always have nutritious ingredients ready to cook.
To learn more about Libre Assist and to see if you qualify for a free† sensor, visit freestylelibre.us/LibreAssist.
The views expressed in this article should not be used for medical diagnosis or treatment or as a substitute for professional medical advice. Individual symptoms, situations and circumstances may vary.
* Libre Assist is a feature within Libre app that uses generative artificial intelligence to provide information on how foods could impact your glucose levels. Generative artificial intelligence may not always be accurate, and it should not be used to make treatment decisions.
** The FreeStyle Libre systems apps are only compatible with certain mobile devices and operating systems. Please check the Support section of our website for more information about device compatibility before using the apps. Use of the FreeStyle Libre systems apps may require registration with LibreView.
^Predicted glucose impact is based on user-provided food data and may differ from actual impact, which depends on sensor readings and factors like activity, stress, medication and alcohol. For personalized advice, consult your healthcare provider.
†Offer available for people who qualify. Visit MyFreeStyle.us to see all Terms and Conditions. Certain exclusions apply. Medicare and Medicaid patients are not eligible. See MyFreeStyle.us for more information.
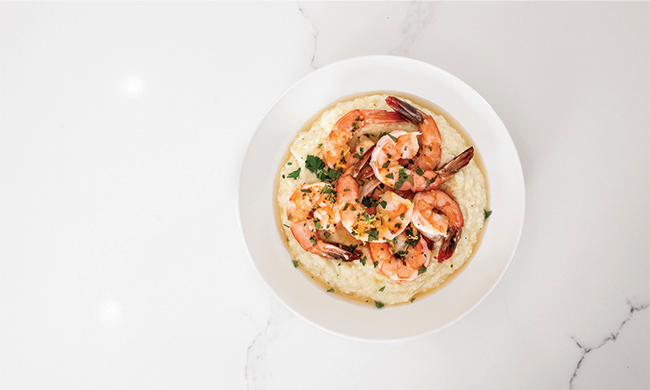
Important Safety Information: Product for prescription only, for Important Safety Information visit FreeStyleLibre.us.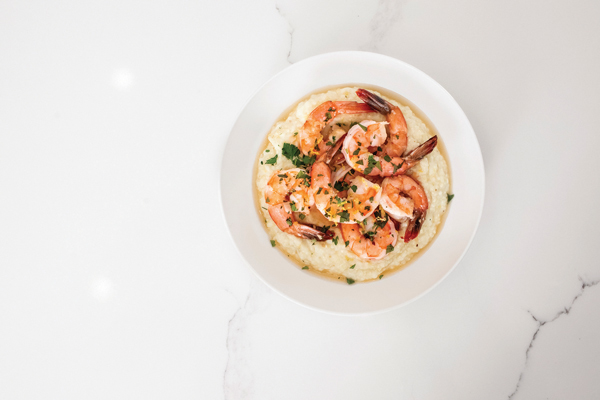
Shrimp Scampi and Cauliflower Grits
Recipe courtesy of Kardea Brown on behalf of Abbott
Prep time: 15 minutes
Cook time: 25 minutes
Servings: 4
Grits:
- 3 cups low-sodium chicken broth
- 1 cup light cream
- 1 cup stone-ground grits
- 1 cup cauliflower rice
- 2 tablespoons butter
- 1/2 cup shredded Parmesan cheese
- 1/4 teaspoon salt
- 1/4 teaspoon black pepper
Shrimp Scampi:
- 2 tablespoons butter
- 2 tablespoons olive oil
- 4 cloves garlic, minced
- 1/2 teaspoon red pepper flakes (optional)
- 1 pound large shrimp, peeled and deveined
- 1/2 cup low-sodium chicken broth
- 2 tablespoons dry white wine
- 1 lemon, juice only
- 1 teaspoon lemon zest
- salt, to taste
- pepper, to taste
- 2 tablespoons chopped parsley
- To make grits: Bring broth and cream to gentle boil; whisk in grits. Cook 10-15 minutes. Stir in cauliflower rice and cook 5-7 minutes. Add butter, cheese, salt and pepper.
- To make shrimp scampi: In pan, heat butter and oil; saute garlic and red pepper flakes, if desired, 30 seconds. Add shrimp, cook 1-2 minutes per side and remove.
- Add broth, wine, lemon juice and lemon zest; simmer 2-3 minutes. Return shrimp; toss; season with salt and pepper, to taste; and stir in parsley.
- Serve shrimp over creamy grits.
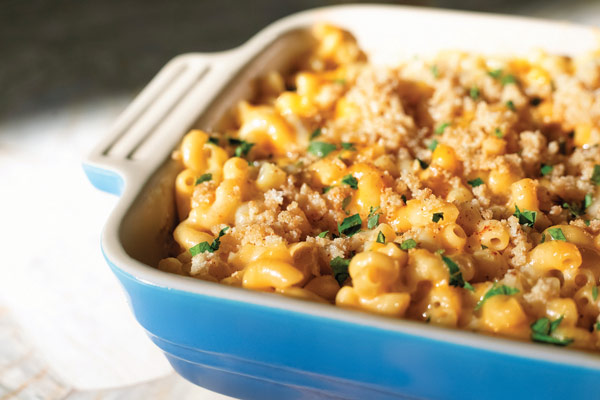
Macaroni and Cheese with Chickpea Pasta
Recipe courtesy of Kardea Brown on behalf of Abbott
Prep time: 20 minutes
Bake time: 30 minutes
Servings: 4-6
Pasta:
- 8 ounces chickpea-based, gluten-free pasta
Bechamel Sauce:
- 2 tablespoons butter
- 3 tablespoons almond flour
- 1 cup half-and-half
- 1/2 cup heavy cream
- 1/2 cup low-sodium chicken or vegetable broth
- 1 teaspoon Dijon mustard
- 1/4 teaspoon garlic powder
- 1/4 teaspoon smoked paprika
- salt, to taste
- black pepper, to taste
Cheese Blend:
- 1 cup medium cheddar cheese, shredded
- 1/2 cup Gruyere cheese, shredded
- 1/4 cup Parmesan cheese, grated
Topping:
- 1/2 cup shredded cheddar and Gruyere cheese
- 2 tablespoons almond flour (optional)
- chopped parsley
- Preheat oven to 375 F and grease baking dish.
- To make pasta: Cook pasta al dente.
- To make bechamel sauce: Melt butter and whisk in almond flour, 1-2 minutes. Slowly add half-and-half, heavy cream and broth. Stir until thickened. Season with mustard, garlic powder, smoked paprika and salt and pepper, to taste. Remove from heat.
- To make cheese blend: Mix cheddar, gruyere and Parmesan. Stir half the cheese blend into bechamel sauce until smooth. Stir in pasta.
- Layer pasta and cheese sauce in dish: half pasta, half cheese and repeat. Top with reserved cheese and almond flour, if desired.
- Cover with foil and bake 15-20 minutes. Remove foil and bake 10-15 minutes uncovered until golden.
- Rest 5 minutes, garnish with parsley and serve warm.
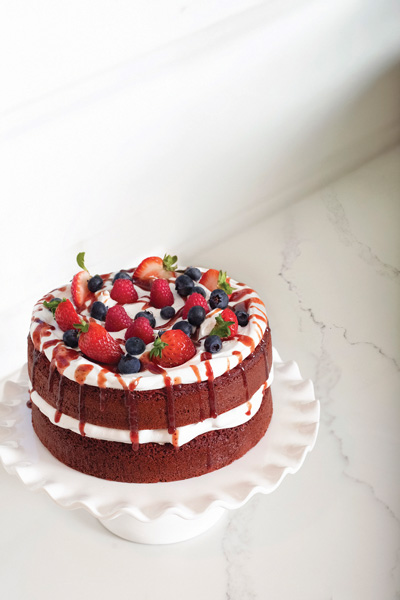
Red Velvet Layer Cake with Almond Flour
Recipe courtesy of Kardea Brown on behalf of Abbott
Prep time: 25 minutes
Bake time: 20 minutes
Chill time: 30-60 minutes
Servings: 12
Cake:
- 2 cups almond flour
- 1 cup whole-wheat pastry flour
- 1 tablespoon unsweetened cocoa powder
- 1 1/2 teaspoons baking powder
- 1/2 teaspoon baking soda
- 1/2 teaspoon salt
- 1 1/2 cups monk fruit-allulose blend
- 3 large eggs
- 1/2 cup plain unsweetened Greek yogurt
- 1/3 cup avocado oil
- 3/4 cup buttermilk
- 1 tablespoon distilled vinegar
- 2 teaspoons vanilla extract
- red food coloring (optional)
Whipped Cream:
- 6 ounces cream cheese, softened
- 1/3 cup powdered monk fruit
- 1 1/2 cups cold heavy whipping cream
Berry Drizzle:
- 1/2 cup no-sugar-added wild berry jam
- 1-2 tablespoons water
- 1 teaspoon lemon juice (optional)
Filling and Topping:
- 2 cups mixed berries (strawberries, blueberries, raspberries)
- Preheat oven to 350 F and grease or line three 8-inch pans.
- To make cake: In bowl, mix almond flour, pastry flour, cocoa powder, baking powder, baking soda, salt and monk fruit-allulose blend. In separate bowl, mix eggs, Greek yogurt, avocado oil, buttermilk, distilled vinegar, vanilla extract and red food coloring, if desired. Combine dry and wet ingredients until smooth. Divide evenly into pans and bake 18-22 minutes. Cool completely.
- To make whipped cream: Whip cream cheese and monk sugar until smooth. Add cream gradually and whip to medium-stiff peaks. Chill.
- To make berry drizzle: Warm berry jam with water and lemon juice, if desired, until pourable; cool slightly.
- To assemble cake: Layer cake, whipped cream, jam and berries; repeat for three layers. Top with berries and drizzle.
- Chill 30-60 minutes before slicing.
Photo courtesy of Abbott (Bryon Smith and Kardea Brown, a paid partner)
SOURCE:
Abbott