Recipe of the Week
Jumpstart Busy School Mornings with Make-Ahead Breakfast Burritos
Hectic school mornings get much easier when breakfast is already waiting in the fridge or freezer. These Healthy Make-Ahead Breakfast Burritos can be assembled in advance, frozen individually and easily reheated for quick, filling meals to keep your family going through the day.


(Feature Impact) Hectic school mornings get much easier when breakfast is already waiting in the fridge or freezer. These Healthy Make-Ahead Breakfast Burritos can be assembled in advance, frozen individually and easily reheated for quick, filling meals to keep your family going through the day.
Eggs, cheese and black beans supply protein to fuel kids for gym class or sports, while vegetables, beans and whole-grain tortillas add complex carbohydrates and fiber to stave off hunger until lunch. Breakfast burritos also make for a hearty, grab-and-go option for adults heading off to work.
One of the best things about homemade breakfast burritos is how easily they can be customized to fit each family member’s unique nutritional needs and preferences. If you’re making a batch for the whole family, prepare a basic filling and let everyone choose their own combination of ingredients. Spice fiends might want to add jalapenos or hot sauce, while vegetable lovers can pack in sauteed broccoli or diced roasted sweet potatoes. Just remember to label the different varieties separately before storing, e.g. “Mild” and “Spicy.”
Although it’s best to avoid mixing in ingredients that don’t freeze well – like avocado or fresh tomatoes – you can always serve the reheated burritos with a side of guacamole or pico de gallo for even more flavor and nutrition.
Find more school-year meal prep inspiration at Culinary.net.
Healthy Make-Ahead Breakfast Burritos
Recipe adapted from The Gracious Pantry
Prep time: 20 minutes
Cook time: 20 minutes
Servings: 4
- 2 teaspoons extra-virgin olive oil
- 1 small red onion, diced
- 1 large red bell pepper, diced
- 2 cloves garlic, minced
- 1 cup chopped fresh spinach
- 1 cup cooked black beans
- 1/2 teaspoon ground cumin
- 1/2 teaspoon smoked paprika
- 4 tablespoons salsa
- salt, to taste
- pepper, to taste
- 6 large eggs
- 2 tablespoons unsweetened almond milk, water or dairy milk
- 4 large whole-grain tortillas
- 1/2 cup shredded Mexican cheese blend
- In pan over medium heat, heat olive oil. Saute onion, bell pepper and garlic until soft, 4-5 minutes. Add spinach and cook until wilted.
- Stir in cooked black beans, cumin, smoked paprika, salsa and salt and pepper, to taste. Remove from heat.
- Whisk eggs with milk or water. In nonstick skillet over medium heat, scramble until just set; avoid overcooking. Season lightly with salt and pepper, to taste.
- Lay tortillas flat. Divide eggs, veggie-bean mixture and cheese across each. Roll into burritos then toast, seam side down, in dry skillet to seal.
- Remove from pan and let cool. Wrap in parchment then foil. Freeze up to 2 months.
- To reheat, remove foil and parchment. In microwave or oven, heat until warmed through.
Notes: To prevent tortillas from becoming soggy, let filling cool to room temperature before assembling burritos.
Burritos can be warmed from frozen or, for best results, thawed overnight in refrigerator before reheating.
Photo courtesy of Unsplash

SOURCE:
🍴 What’s your favorite food, recipe, or dining spot? Tell us in the comments! Then subscribe to the STM Daily News newsletter for fresh recipes, restaurant news, food trends, and delicious stories delivered straight to your inbox. Join our growing community of food lovers today!


Recipe of the Week
Warm Up Autumn Days with Rich, Creamy Pumpkin Soup
Nothing screams fall quite like pumpkins, and as the weather gets cooler, there’s no better way to enjoy them than in a hot bowl of homemade soup. Roasting a whole pumpkin or kabocha squash creates deeper, richer flavors in this Creamy Pumpkin Soup recipe.

Warm Up Autumn Days with Rich, Creamy Pumpkin Soup
(Feature Impact) Nothing screams fall quite like pumpkins, and as the weather gets cooler, there’s no better way to enjoy them than in a hot bowl of homemade soup.
Roasting a whole pumpkin or kabocha squash creates deeper, richer flavors in this Creamy Pumpkin Soup recipe, but if you don’t have much time to spend in the kitchen, canned pumpkin offers a convenient alternative. Aromatic onion and garlic join warm autumnal spices like ginger and cardamom for a bowl with harmonizing layers of flavor.
Whether you want a pot of pumpkin soup simmering on the stove on a rainy day or plan to serve it as a sophisticated holiday appetizer, this recipe is a delicious way to make the most of the season’s harvest.
Find more seasonal recipe inspiration at Culinary.net.
Creamy Pumpkin Soup
Recipe adapted from Love and Lemons
Prep time: 20 minutes
Cook time: 1 hour, 20 minutes
Servings: 6
- 1 pumpkin or kabocha squash (about 4 pounds)
- 2 tablespoons extra-virgin olive oil, plus more for drizzling, divided
- 1 teaspoon sea salt, plus more for sprinkling, divided
- freshly ground black pepper
- 1 medium yellow onion, chopped
- 1 shallot, chopped
- 3 garlic cloves, chopped
- 1 teaspoon grated fresh ginger
- 1 teaspoon ground cumin
- 1/2 teaspoon ground coriander
- 1/2 teaspoon turmeric
- 1/2 teaspoon ground cardamom
- 1 can (14 ounces) full-fat coconut milk, divided
- 2 1/2 cups vegetable broth
- 1 tablespoon apple cider vinegar
- water (optional)
- cayenne pepper, to taste
- 1/4 cup roasted pumpkin seeds (optional)
- Preheat oven to 400 F and line baking sheet with parchment paper.
- Cut pumpkin in half and scoop out seeds. Drizzle with olive oil and sprinkle with salt and pepper then place cut side down on baking sheet. Roast 40-60 minutes, or until soft. Allow to cool then peel away skin and measure 4 1/2 packed cups of flesh.
- In large pot or Dutch oven, heat 2 tablespoons olive oil over medium-low heat. Add onion and shallot and cook 12-15 minutes until softened and caramelized.
- Add 1 teaspoon salt, garlic, ginger, cumin, coriander, turmeric and cardamom; stir 30-60 seconds until spices are aromatic. Stir in cooked pumpkin; coconut milk, reserving some for garnish; and broth. Simmer 20 minutes then stir in vinegar.
- Transfer to high-powered blender, working in batches if necessary, or use immersion blender and blend until smooth. If soup is too thick, gradually add up to 1 1/2 cups water until desired consistency is reached.
- Pour into bowls and garnish with additional coconut milk, salt, pepper, dash of cayenne and pumpkin seeds, if desired.
Substitution: For convenience, use two cans (15 ounces each) of pumpkin puree instead of whole pumpkin.
Photo courtesy of Unsplash
SOURCE:
🍴 What’s your favorite food, recipe, or dining spot? Tell us in the comments! Then subscribe to the STM Daily News newsletter for fresh recipes, restaurant news, food trends, and delicious stories delivered straight to your inbox. Join our growing community of food lovers today!

Food and Beverage
Philly-Style Chicken Cheesesteak Sandwiches: An Easy, Cheesy Dinner
Bring sandwich night home with these Philly-style chicken cheesesteaks. Thinly sliced chicken, sautéed onions and peppers, and melted cheese fill toasted hoagie rolls for a satisfying meal in about 35 minutes.
Food & Drink
Easy Philly Chicken Cheesesteak Recipe
Tender chicken, golden onions, sautéed peppers, and melted cheese tucked into a toasted hoagie roll—this Philly-style chicken cheesesteak brings plenty of comfort to the dinner table without a complicated ingredient list.
Inspired by the beef cheesesteak, this chicken version makes a satisfying lunch, a casual weekend meal, or an easy dinner when you want something warm and filling. The trick is to slice the chicken thin, give it room to brown, and melt the cheese right over the filling before scooping everything into the rolls.
This home-style recipe includes bell peppers, with mushrooms as an optional addition. Make it your own with creamy white American cheese, mild provolone, or a slice of each.
Recipe at a Glance
● Servings: 4 sandwiches
● Prep time: Approximately 15 minutes
● Cook time: Approximately 20 minutes
● Total time: Approximately 35 minutes
● Equipment: Large skillet with a lid, cutting board, sharp knife, and a separate skillet or oven for toasting rolls
Ingredients
For the filling
● 1½ pounds boneless, skinless chicken breasts or thighs, very thinly sliced across the grain
● 1 medium yellow onion, thinly sliced
● 1 large green bell pepper, seeded and thinly sliced
● 2 tablespoons olive oil or neutral cooking oil, divided
● 1 teaspoon garlic powder
● ½ teaspoon paprika
● ½ teaspoon salt, or to taste
● ½ teaspoon freshly ground black pepper
● 8 slices provolone or white American cheese, or a combination
For the sandwiches
● 4 hoagie rolls
● 2 tablespoons softened butter
● Mayonnaise, optional
● Hot sauce or sliced pickled peppers, optional
Optional addition: 8 ounces sliced mushrooms. Cook them with the vegetables, working in batches if needed so they brown instead of steam.
How to Make Philly-Style Chicken Cheesesteaks
1. Slice and season the chicken
Slice the chicken as thinly as you comfortably can, cutting across the grain. Toss with the garlic powder, paprika, salt, and black pepper.
Kitchen tip: If the chicken is difficult to slice, place it in the freezer for 15–20 minutes to firm it slightly first. This optional chilling time is additional to the recipe’s listed prep time.
2. Sauté the onions and peppers
Heat 1 tablespoon of oil in a large skillet over medium-high heat. Add the onion and bell pepper. Cook for approximately 6–8 minutes, stirring occasionally, until softened and lightly browned.
Transfer the vegetables to a plate.
3. Cook the chicken
Add the remaining tablespoon of oil to the skillet. Add the chicken in an even layer, cooking in batches if necessary.
Cook for approximately 5–7 minutes, turning and separating the pieces as they cook. Timing will vary with the thickness of the chicken and the heat of your pan. Cook until the chicken reaches 165°F, checking the thickest pieces with a food thermometer.
Use a spatula to break the cooked chicken into smaller, sandwich-friendly pieces.
4. Toast the rolls
While the chicken cooks, split the hoagie rolls without cutting all the way through. Spread the cut sides with softened butter.
Toast them butter-side down in a separate skillet over medium heat until lightly golden. Alternatively, toast them cut-side up under the broiler, watching closely.
5. Combine the filling and melt the cheese
Return the cooked vegetables to the skillet with the chicken and toss together. Reduce the heat to low.
Arrange the filling into four portions and place two slices of cheese over each portion. Cover the skillet briefly, just until the cheese melts. If your skillet is too small, melt the cheese over two portions at a time.
6. Fill and serve
Spread a little mayonnaise inside the rolls if desired. Scoop a portion of cheesy chicken and vegetables into each roll.
Finish with hot sauce or pickled peppers if you like a little heat, and serve immediately.
Tips for a Better Sandwich
Keep the chicken thin. Thin slices cook quickly and make the sandwich easier to bite into.
Give the pan some space. Crowding traps moisture. Cooking in batches helps the chicken develop a browned surface.
Choose a sturdy roll. A roll with a soft interior and enough structure to hold the filling works well. Light toasting helps it stand up to the juices.
Pick your cheese. White American gives the filling a creamy texture. Provolone adds a mild, slightly tangy flavor. Combining them gives you a little of both.
Adjust the vegetables. Try red bell pepper for a sweeter filling, add mushrooms, or keep it simple with onions and cheese.
What to Serve With Chicken Cheesesteaks
French fries, potato wedges, coleslaw, or a crisp green salad all make easy sides. For a simple lunch, add a dill pickle and a handful of potato chips.
Can You Make the Filling Ahead?
Yes. Cook the chicken and vegetables ahead, then keep the filling separate from the rolls. Reheat it until hot throughout before adding cheese and assembling the sandwiches. Toast the rolls just before serving for the best texture.
A Comfort-Food Favorite for Your Dinner Rotation
These Philly-style chicken cheesesteaks turn a handful of everyday ingredients into a hearty meal. With tender chicken, sautéed vegetables, and cheese melted into every serving, they’re an easy option for sandwich night.
What goes on your chicken cheesesteak—provolone, white American, mushrooms, or extra peppers? Tell us in the comments.
Find more recipes and meal inspiration in the STM Daily News Food & Drink section.
Related reading from STM Daily News
- Easy Homemade Chicken Alfredo Recipe Another comforting chicken dinner to try.
- Fried Chicken from the Comfort of Home More inspiration for homemade chicken meals.
- How to Make Country Style Lemonade A refreshing drink to serve with your sandwiches.
- STM Daily News Food & Drink Explore more recipes, food news, and meal ideas.
Helpful cooking reference
Safe Minimum Internal Temperatures — FoodSafety.gov Supports the recipe’s instruction to cook chicken to 165°F.
- Philadelphia Cheesesteaks — Visit Philadelphia — Explore Philadelphia’s signature sandwich and cheesesteak culture. Visit Philadelphia
- A Guide to the Best Cheesesteaks in Philadelphia — Includes shops serving traditional and chicken variations. Visit Philadelphia
- Chicken From Farm to Table — USDA — Guidance on handling, thawing, cooking, and storing chicken. Food Safety and Inspection Service
- Leftovers and Food Safety — USDA — Helpful storage and reheating guidance for leftover sandwich filling. Food Safety and Inspection Service
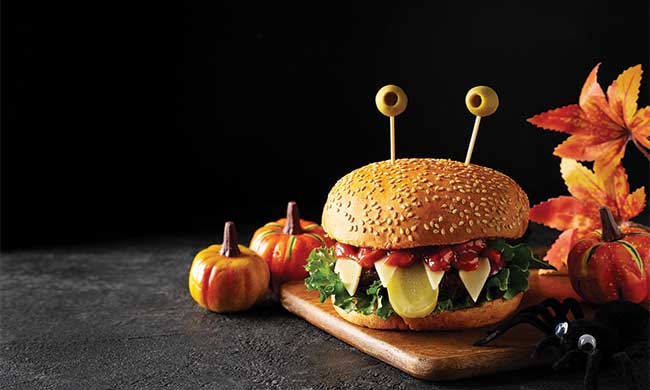
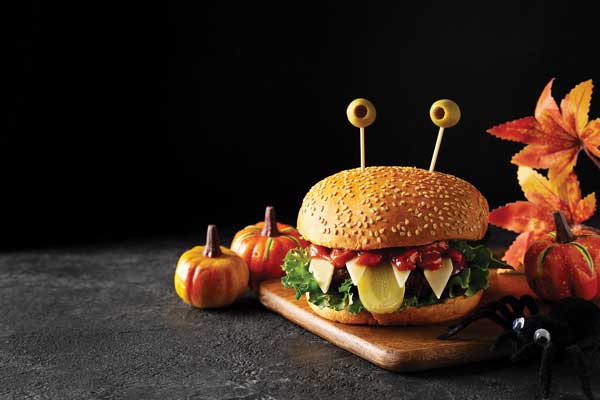
(Feature Impact) Out with the ordinary, in with the weird – that’s what the Halloween season is all about. These Halloween Monster Burgers give a ghoulishly fun twist on burger night, featuring all your favorite toppings transformed into olive eyes, cheese fangs and a pickle tongue.
Whether you reach for a traditional hamburger patty or switch it up with chicken, turkey, bean or veggie options, the effect is the same: a dinner that looks like it escaped from a mad scientist’s lab. It’s a good way to get some protein and veggies into kids before the trick-or-treating sugar rush, and you can even make it interactive by inviting them to decorate their own monsters and come up with creative variations.
Alternatively, if you’re looking for some spooky hors d’oeuvres to impress at this year’s Halloween party, these burgers are easy to size down into slider form. Serve a whole tray of mini monsters ready to devour – or be devoured by – hungry guests.
Find more Halloween recipe inspiration at Culinary.net.
Halloween Monster Burgers
Recipe adapted from Happy Foods Tube
Prep time: 10 minutes
Total time: 18 minutes
Servings: 4
- 4 hamburger, chicken or veggie patties
- 4 tablespoons mayonnaise
- 4 teaspoons ketchup, plus additional, to taste, divided
- 4 hamburger buns
- 8 leaves baby romaine lettuce
- 4 slices dill pickles, sliced lengthwise
- 4 cheese slices
- 8 large green olives, pits removed
- Cook burger patties until they reach desired doneness.
- In small bowl, combine mayonnaise and 4 teaspoons ketchup. Spread each bun base with about 1 tablespoon mayo sauce then add two lettuce leaves and cooked burger patty.
- Add pickle slice as monster “tongue.” Take each cheese slice and cut triangles into one side to resemble teeth; add to burger then cover with ketchup “blood,” to taste.
- Stick olives on toothpicks and add two to each top bun as “eyeballs.”
Photo courtesy of Shutterstock

SOURCE: