home improvement
5 Steps to Get Your Yard Ready for Spring
Preparing your yard for a healthy growing season

(Family Features) As the weather begins to warm and days get longer, it’s important to begin preparing your yard for a healthy growing season. While factors like climate, soil type and grass type can all impact how your yard grows, there are a few steps you can take during the spring months to help your lawn thrive.
From dethatching and aerating to fertilizing and mowing, tackling these simple chores can help ensure your yard looks its best and is prepared to fight off seasonal weeds, disease and drought.
Tune Your Mower
Before it’s time for the first mowing of the season, inspect your mower and perform any routine maintenance necessary. That goes beyond sharpening, or replacing, the blade, and includes changing the oil, spark plugs and filter as well as filling with a fresh tank of gas.
Loosen the Thatch Layer
While it’s important to avoid working on your lawn until after the final freeze to avoid damaging the grass, raking your yard with a spring tine rake to loosen thatch – the layer of leaves, roots and dead grass that builds up between live grass and soil – before the first mow is equally important. Be sure to rake when the soil is dry; if it’s too soft or muddy, you may pull up healthy grass crowns.
Combat Compacted Soil
If your soil has become compacted – likely the effect of heavy foot traffic – and is too dense for water, air and other nutrients to reach the roots of your grass, aerating can help break it up and reduce thatch. A core, or plug, aerator can introduce tiny holes into your soil by removing plugs of grass and soil, which lets nutrients more easily reach the roots. An added bonus, the plugs can decompose on top of your grass, supplying more nutrients.
Fill in Bare Spots
If your lawn is looking sparse, overseeding, which involves spreading grass seed over your existing lawn, can help fill in bare spots. Be sure to choose the right type of seed for your climate and soil type to ensure proper growth. Applying a slow-release nitrogen fertilizer at the same time can provide additional nutrients that are important for promoting healthy growth.
Start Seasonal Mowing
When the ground is dry enough and your grass is long enough to require cutting, begin seasonal mowing. Be sure to use proper techniques, including varying your mowing direction each time to avoid creating patterns or ruts, and avoid cutting grass too low, which can make the lawn more susceptible to weeds and drought stress. In general, never remove more than one-third of the grass blade at a time.
Find more tips to help get your yard ready for warm weather at eLivingtoday.com.
Photo courtesy of Unsplash
SOURCE:
eLivingtoday.com
Author
Discover more from Daily News
Subscribe to get the latest posts sent to your email.

Consumer Corner
Avoid a Summer Breakdown: Why Now is a Smart Time to Replace an Old HVAC System
As summer approaches, homeowners are encouraged to replace outdated HVAC systems in spring for improved efficiency and cost savings. Many homeowners lack awareness of their system’s age and lifespan, leading to higher long-term costs. Investing in a modern system enhances air quality, reduces energy bills, and adds home value.

(Feature Impact) With summer heat just around the corner, homeowners may not be aware that spring can be a perfect time to prepare for rising temperatures. An outdated heating, ventilation and air conditioning (HVAC) system, for example, may not be up for the task of keeping a home cool.
In fact, it can end up costing homeowners more in the long term due to a gradual decline in efficiency and more frequent repairs. In addition to savings over time, there are multiple reasons to replace an aging system this spring.
In a recent survey, Carrier found more than one-quarter (26%) of homeowners don’t know the age of their HVAC system, and a slight majority (54%) don’t know the average lifespan of one. Those knowledge gaps can result in missed opportunities for long-term savings.
Aging Systems Can’t Take the Heat
Many homeowners postpone purchasing a new HVAC system until their existing system fails or they find their aging system is struggling to maintain a consistent temperature. Often, upfront costs deter homeowners from purchasing a new system; however, 8 in 10 homeowners would consider a new heating and cooling system if it paid for itself in energy savings within 5-10 years. With a new energy-efficient system, those savings are possible.
A New HVAC System is a Critical Home Investment
 Modern heating and cooling systems have uses beyond heating and cooling. They can improve air quality in the home by balancing humidity levels, reducing drafts and keeping a consistent climate throughout multiple rooms and stories. They also use less energy and run more quietly than older systems, making a home quieter and more cost-effective.
HVAC Basics Many Homeowners Miss
HVAC units often go unseen, yet a home’s comfort depends on them running consistently. It’s critical that homeowners schedule annual maintenance appointments to ensure their system is running as it should and they’re aware of when it may be time to replace.
While it may seem more cost-effective to stick with an outdated system for one more season, an old system could end up prolonging issues and ultimately cost homeowners more in repairs.
Spring is an ideal time to invest in a new HVAC system, as contractors are generally more available to install a new system and homeowners can get ahead of the summer heat, ensuring they’ll be cool all season long.
Signs It’s Time to Replace
Red flags that indicate it’s time for a new HVAC system include: a system that’s more than 10-15 years old, a system that needs noticeably more repairs, energy bills going up despite usage remaining the same, inconsistent temperatures, a system struggling to maintain the desired temperature or a system that’s constantly running or seems less efficient than it used to.
Many companies offer specials during the spring and fall months, known as shoulder season. For example, until May 31, Carrier is offering 0% APR for 60 months and up to $2,100 in rebates so customers can get a jumpstart on a cool, comfortable home. A new HVAC system means more than just cool temps this summer; it means added home value, cleaner air and peace of mind.
Learn more about available rebates, tax credits and financing plans at Carrier.com or by contacting a local expert.


SOURCE:
Carrier
Welcome to the Consumer Corner section of STM Daily News, your ultimate destination for savvy shopping and informed decision-making! Dive into a treasure trove of insights and reviews covering everything from the hottest toys that spark joy in your little ones to the latest electronic gadgets that simplify your life. Explore our comprehensive guides on stylish home furnishings, discover smart tips for buying a home or enhancing your living space with creative improvement ideas, and get the lowdown on the best cars through our detailed auto reviews. Whether you’re making a major purchase or simply seeking inspiration, the Consumer Corner is here to empower you every step of the way—unlock the keys to becoming a smarter consumer today! https://stmdailynews.com/category/consumer-corner
Discover more from Daily News
Subscribe to get the latest posts sent to your email.
Consumer Corner
Spruce Up Your Home for St. Patrick’s Day
Spruce Up Your Home: Spring is just around the corner, and there are few better ways to freshen up your home than with a wee bit of St. Patrick’s Day decor.
Last Updated on March 15, 2026 by Daily News Staff
(Feature Impact) Spring is just around the corner, and there are few better ways to freshen up your home than with a wee bit of St. Patrick’s Day decor.
Spruce Up Your Home for St. Patrick’s Day
A Splash of Green and a Sparkle of Gold
Whether you love emerald, lime, sage or leafy green shades, simply adding a pop of a new-to-you hue can infuse your home with some St. Paddy’s fever. Check craft stores for reusable greenery to place in a pot or vase, or get crafty and dot pinecones with glue before dusting them with green glitter and placing them in a glass bowl to make a festive display worthy of a leprechaun’s seal of approval. Get Ready for Spring and Shop New Arrivals to Refresh Your Space!
Scent of the Season
Lighting a candle not only creates a festive vibe, but the aroma from a scented candle can remove any staleness in the air and bring some ambiance to your home. Any earthy scent will do – from juniper to fir, pine, sandalwood or amber. Woodsy choices infuse a room with comfort and warmth. Decorative elements like metal charms, beads and crystals (in bright green or gold) add a pop of whimsy to your candle, too.
Shape a Shamrock
Holidays are ideal times to flex your creative muscles and give your home a little artsy edge. Scour the shelves at dollar stores or thrift shops for things like green clay or modeling dough, colored paper, wooden shamrocks, stickers and inexpensive paint sets. Set your artistic side free with paintings or drawings of shimmery rainbows, mischievous leprechauns and shamrocks in various sizes.
Coins, Clover and Centerpieces
One of the easiest ways to add a little Celtic cheer to your home is with joyful table decor. Add some gold shimmer to your dining room table with sparkly ribbons, a bright runner and gold-flecked napkin rings. A fancy glass filled with green baubles and pebbles can be both subtle and festive. A scattering of faux gold coins and rainbow napkins can make the space feel merry and magical.
Find more ideas to get your home ready for St. Patrick’s Day at eLivingtoday.com.
Photo courtesy of Shutterstock
SOURCE:
Welcome to the Consumer Corner section of STM Daily News, your ultimate destination for savvy shopping and informed decision-making! Dive into a treasure trove of insights and reviews covering everything from the hottest toys that spark joy in your little ones to the latest electronic gadgets that simplify your life. Explore our comprehensive guides on stylish home furnishings, discover smart tips for buying a home or enhancing your living space with creative improvement ideas, and get the lowdown on the best cars through our detailed auto reviews. Whether you’re making a major purchase or simply seeking inspiration, the Consumer Corner is here to empower you every step of the way—unlock the keys to becoming a smarter consumer today!
https://stmdailynews.com/category/consumer-corner
Discover more from Daily News
Subscribe to get the latest posts sent to your email.
home improvement
Enhance Your Home with Bold Colors
Homeowners seeking ideas to make a design statement and modernize their home interiors and exteriors can incorporate bold colors to achieve their renovation goals. Learn how to incorporate bold colors into your home with these tips.
Last Updated on March 14, 2026 by Daily News Staff
Enhance Your Home with Bold Colors
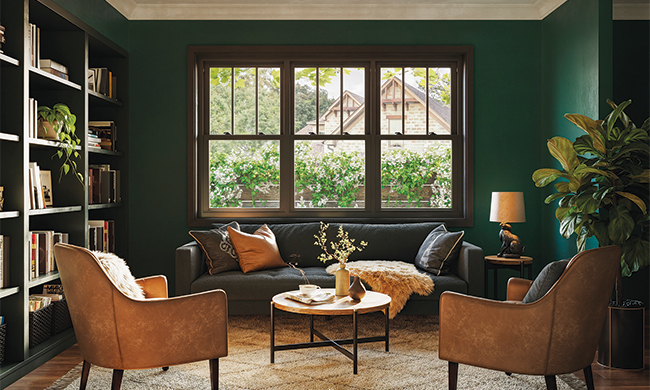
(Family Features) Homeowners seeking ideas to make a design statement and modernize their home interiors and exteriors can incorporate bold colors to achieve their renovation goals. Neutrals may be versatile, but bold colors introduce a striking way to reflect personality and elevate a home’s design. Learn how to incorporate bold colors into your home with these tips from the design experts at Simonton Windows & Doors, part of Cornerstone Building Brands, a leading manufacturer of windows in North America. Interior Paint The wall color sets the tone of a room’s overall ambiance, but many homeowners are cautious about incorporating too much color. That’s a valid concern, since too many vibrant hues can feel overwhelming or create competing focal points that leave a room feeling cluttered and busy. The key to bold colors on walls is balance. Bold walls offset by moderate flooring and furnishings create a room that is equally attention-grabbing and tastefully grounding. If you’re hesitant about taking bold colors too far, try designing your room with one bold accent wall and complement that color with accessories such as pillows and rugs or even statement furnishings to tie it all together. Replacement Windows Windows often fade into a home’s design aesthetic, but that doesn’t have to be the case. In fact, dark window finishes are becoming one of the season’s biggest design statements, offering homeowners a way to refresh their home’s curb appeal. In response to growing consumer demand for sleek, modern window designs, Simonton introduced on-trend black and bronze interior and exterior finishes across its vinyl window collections, including DaylightMax Windows, which feature a unique slim-frame window design offering ample natural light while providing maximum energy efficiency. For maximum impact, durability and low-maintenance appeal, consider pairing black or bronze window finishes with trending seasonal palettes and decor. Cabinetry Architectural elements can also play an important role in establishing a modern design motif for your home. This is especially true when it comes to the cabinetry in your kitchen and bathroom. Stepping away from classic neutral wood stains, white or gray to use bold paint or stain colors instead can completely transform a room. Some homeowners go all-in and incorporate color across the entire room while others apply different colors for the tops and bottoms to create some variation or avoid overdoing a bold hue. Still others opt for a statement approach, and similar to choosing just one wall, they add a bold color to just one section of cabinetry, such as a coffee station or island base. Cabinetry hardware adds another dimension of bold design. Stepping away from classic brushed nickel or oil-rubbed bronze and instead installing matte black, brushed brass, bronze or gunmetal brings a contemporary vibe that can accentuate a bold color choice. Patio Doors Establishing continuity between your indoor and outdoor living spaces means making your patio door part of a cohesive design that flows from the indoors out. An option like the Simonton MaxView Multi-Slide Patio Door Collection does precisely that. With custom sizing up to 10 feet high and 30 feet wide, the collection is available in multiple panel options with bypass, pocket or bi-part configurations. The doors also come in black or bronze exterior finishes, reflecting the trend toward bolder color choices. “Homeowners want modern design without compromising performance,” said Kate Land, vice president of product and innovation at Cornerstone Building Brands. “Incorporating these innovative, durable finishes into our premium vinyl window and door collections delivers exactly that. These bold color options elevate a home’s overall design while the advanced glass and functionality of these vinyl windows deliver the highest standards of energy efficiency and durability.” Incorporating bold colors into your design can make the space feel your own while demonstrating personality and modernization. Find more ideas and inspiration to answer the call for bold style at simonton.com.
 Discover more from Daily News
Subscribe to get the latest posts sent to your email.