home gardening
7 Garden Growing Basics for Beginners
Last Updated on October 12, 2025 by Daily News Staff
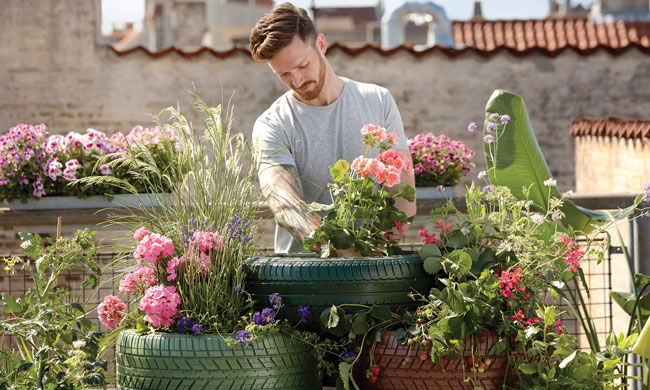
Garden Growing Basics
(Family Features) Growing your own produce is an all-around smart practice, from the money you’ll save at the grocery store to the contributions you can make toward a cleaner planet.
Maintaining a garden takes some effort, but it’s a project even a beginner can tackle with ease. Consider these tips to start growing your at-home garden:
- Select a perfect spot. You’ll want to place your garden in an area where you see it often so you’re reminded to weed and care for it regularly. Find a flat area you can access easily, where erosion and other pitfalls (including hungry wildlife) won’t be a problem.
- Choose between ground and containers. There are pros and cons to gardening in containers vs. the ground, and there’s no universal right choice. Rather, the best garden depends on your goals and preferences. A ground garden usually offers more space and may provide a better growth environment for roots. However, a container garden is often easier to maintain and may be all you need if you wish to grow just a few plants.
- Understand the importance of quality soil. You may think any dirt will do, but keep in mind the soil you plant in will be the primary source of nutrients for your produce. Not only that, but quality soil provides stability so plants can root firmly and grow healthy and sturdy to support their bounty. Quality soil also allows for ample drainage. Organic matter like compost, leaf mold or aged manure all help improve soil quality.
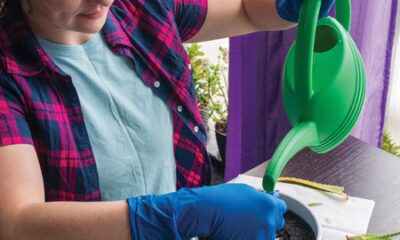
- Keep water close. Lugging water can quickly eliminate the pleasure of tending your garden, so be sure you’re situated near a hose. You’ll know it’s time to water when the soil is dry about an inch below the surface.
- Plan for plenty of sun. A bright, sunny spot is a must, since most vegetables, herbs and fruits depend on six or more hours of sun every day. Remember the sun’s path changes throughout the year, and as trees and foliage grow, they may produce more shade with each growing season.
- Consider what you’ll grow. Starting with veggies you know you like is a smart starting point since you’ll be pouring sweat equity into making them grow. Over time, you might add new varieties, but early on, keep your focus on foods you know you like so you can see a meaningful return and avoid waste. You’ll also need to consider what you can grow to maturity within your area’s growing season. If necessary, you might want to start transplants you can nurture indoors before moving them outside when the temperatures allow.
- Plant according to a calendar. Knowing how long it takes different foods to mature will help you create a planting calendar. You don’t want to harvest everything at once, and if you stagger planting and replant what you can, you’ll have a garden that produces food for your family for a longer period of time.
Find more helpful tips for managing your home and garden at eLivingtoday.com.
Photo courtesy of Unsplash
SOURCE:
Family Features
Discover more from Daily News
Subscribe to get the latest posts sent to your email.


Last Updated on March 13, 2026 by Daily News Staff
(Feature Impact) To add charm to your yard, encourage local wildlife and give you a front-row seat to nature, building a birdhouse is a simple weekend project that checks all of those boxes.
Building a Birdhouse
Seasoned DIYers and first-timers alike can follow this step-by-step guide to create a functional, welcoming birdhouse.
Step 1: Choose the Right Design
Start by deciding what type of birds you’d like to attract. Different birds prefer different house sizes and entrance types. A simple, classic birdhouse design makes the project beginner-friendly and works well for common backyard birds like wrens, chickadees and bluebirds. In general, plan for at least a 1-1 2/2-inch entrance hole, a 5-by-5-inch interior space and 2 inches or more of roof overhang.
Step 2: Gather Materials and Tools
Most DIY birdhouses can be built with basic materials and tools you may already have at home, including untreated cedar or pine wood, screws or nails, wood glue, sandpaper and exterior-safe paint as well as a measuring tape, pencil, saw and drill.
Step 3: Measure and Cut Wood
Measure and cut wood to make the front panel, back panel, two side panels, floor and roof. Then sand all edges for smooth assembly.
Step 4: Drill Holes
Using a hole-saw bit, drill the entrance hole into the front panel. Position it a few inches below the roofline to keep predators out. Next, drill 2-3 small drainage holes in the floor piece to prevent water buildup and help keep the birdhouse dry.
Step 5: Assemble the Birdhouse
Attach the side panels to the back panel using screws or nails. Add the front panel then secure the floor piece, slightly recessed, so rainwater can drain. Attach the roof last, making sure it slopes slightly to allow water to run off.
Step 6: Paint the Exterior
If you plan to paint your birdhouse, stick to neutral, nature-inspired colors. Light browns, soft greens or white help regulate temperature and blend into the environment.
Step 7: Mount Your Birdhouse
Once dry, place your birdhouse in a quiet, sheltered spot away from heavy foot traffic. Mount or hang it 5-10 feet off the ground, facing away from prevailing winds.
Visit eLivingtoday.com for more DIY project inspiration.
Photo courtesy of Shutterstock
SOURCE:

Our Lifestyle section on STM Daily News is a hub of inspiration and practical information, offering a range of articles that touch on various aspects of daily life. From tips on family finances to guides for maintaining health and wellness, we strive to empower our readers with knowledge and resources to enhance their lifestyles. Whether you’re seeking outdoor activity ideas, fashion trends, or travel recommendations, our lifestyle section has got you covered. Visit us today at https://stmdailynews.com/category/lifestyle/ and embark on a journey of discovery and self-improvement.
Discover more from Daily News
Subscribe to get the latest posts sent to your email.
home gardening
Start Planning Now for a Thriving Spring Garden
Winter offers an ideal time to plan for a successful spring garden. Assess your current space, research planting ideas, and design an efficient layout. Enhance soil health with compost, start seeds indoors for stronger plants, and organize tools to ensure readiness for the growing season. Prepare now for a thriving garden.
Last Updated on March 11, 2026 by Daily News Staff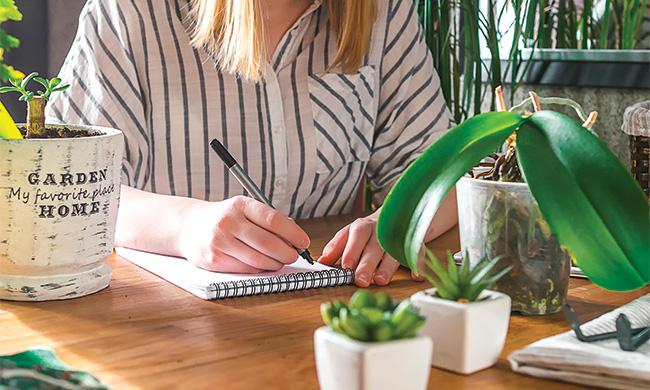
Start Planning Now for a Thriving Spring Garden
(Family Features) While winter weather puts outdoor gardening on pause in most parts of the country, the colder months offer a perfect opportunity to begin preparing for a lush garden come springtime.
With a little creativity, and some extra time spent creating a plan, you can set yourself on a path toward success before the growing season even begins.
Assess Your Space and Research Ideas
Evaluate your current garden, taking note of what worked well last season and where improvements can be made. Use this downtime to sketch an updated layout, research companion plants and decide which fruits, vegetables or flowers you want to grow next based on what did (or didn’t) work last spring.
Build an Updated Blueprint
Winter is the ideal time to upgrade your garden design and make tweaks for efficiency. Use the offseason to consider crop rotation patterns for optimal soil health as well as ways to maximize your space such as raised beds, trellises or containers. You can also make a list of materials needed for any new features you may be adding, such as an irrigation system, and map out their placement so you’re ready to build as soon as the weather allows.
Nourish the Soil
Even if the ground is frozen, you can prepare your garden beds by adding compost, leaves or organic matter in late winter, ensuring nutrients are available when spring arrives. Also remember to test your soil’s pH level now, which can help guide your fertilization plan.
Start Seeds Indoors
If you’re eager to get your hands dirty, consider starting your seeds indoors. Early seed starting gives plants a head start, allowing you to transplant stronger seedlings outdoors when temperatures warm.
Get Organized
Use the slower pace of winter to clean and sharpen your garden tools, sort through leftover seeds and make a supply checklist so you’re ready to dig in when warmer days arrive.
Find more advice to get your garden ready to burst to life in spring at eLivingtoday.com.
Photo courtesy of Shutterstock
SOURCE:
Discover more from Daily News
Subscribe to get the latest posts sent to your email.
Last Updated on February 27, 2026 by Daily News Staff
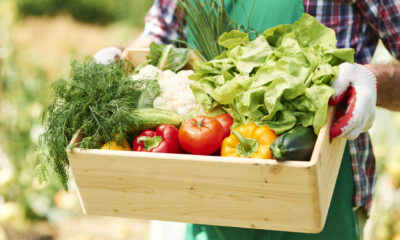
7 Vegetables to Grow Easily in Your Home Garden
(Family Features) Growing fresh, healthy vegetables at home may not be as hard as it sounds. Novice gardeners just need good dirt, easy plants to grow, lots of sunshine and the right amount of water.
Once you’ve prepared your garden plot, select one or all of these vegetables, which are among the easiest to grow:
- Lettuce – Plant lettuce seeds directly into the garden or a pot then repeat every two weeks. It can be cut a few weeks after planting. Some harvest lettuce by pulling it up – roots and all – but cutting a little off the top every few days can keep it growing until summer’s heat turns it too bitter.
- Spinach – This vitamin-packed green is planted and harvested just like lettuce.
- Cucumbers – Make several mounds of dirt near the edge of your garden and place 2-3 plants around the center of each. Cucumbers are notorious for growing vines that overtake other plants, so be vigilant about keeping them contained.
- Squash – Like cucumbers, summer squash is planted on small mounds at the edges of a garden so their vines can be contained. Most varieties, such as yellow squash and zucchini, are quite prolific and just a few plants can feed a large family all summer long.
- Tomatoes – Purchase plants that grow best in your area of the country from your local garden center. All plants should be staked or enclosed in tomato cages because successful plants produce an abundance of large, heavy fruit throughout the summer months.
- Bell Peppers – Bell peppers are easiest to grow from plants. Space them about 1 foot apart then watch them take off with little care required. The only real trick to growing bell peppers is knowing when to harvest. If you’re growing red, orange or yellow varieties, they’ll start out green then turn color as soon as they ripen.
- Carrots – Dig a long, shallow trench in soil that is free of rock. Sprinkle the seeds along the row, cover lightly with topsoil and wait for the top of the carrot to pop through the soil. Once a bit of orange appears, pull and enjoy.
Find more tips for growing a bountiful garden at eLivingtoday.com.
Photo courtesy of Unsplash
SOURCE:
Family Features
Author
Discover more from Daily News
Subscribe to get the latest posts sent to your email.