recipes
Create Showstopping Holiday Meals with Recipes Featuring Premium Pork


(Family Features) If you’re wondering what to serve for a delightful holiday meal, look no further than pork – a perfect match for festive menus as it’s easy to prepare, versatile, budget-friendly and pairs well with seasonal ingredients.
With flavorful, mouthwatering recipes like Apple Cider Balsamic Glazed Pork Loin and Stuffing-Filled Pork Chops, Coleman All Natural Meats offers trusted premium pork sourced from American farmers who humanely raise livestock with no antibiotics ever and no added hormones. All its pork is made of Heritage Breed Duroc, which is known for its tenderness, superior marbling, juiciness and flavor.
These elevated, seasonal pork recipes offer a delicious and unexpected twist your friends and family will love at your next holiday gathering.
For more recipe inspiration, visit ColemanNatural.com.
Apple Cider Balsamic Glazed Pork Loin
Prep time: 10-15 minutes
Cook time: 45-60 minutes
Servings: 6
- 1 Coleman Pork Loin (4 pounds)
- salt, to taste
- pepper, to taste
- 1 tablespoon olive oil
Glaze:
- 1 cup apple cider vinegar glaze
- 6 tablespoons whole grain mustard
- 4 teaspoons balsamic vinegar
- 1 teaspoon minced rosemary
- 1 teaspoon minced sage
- 1 teaspoon minced thyme
- 2 teaspoons minced garlic
- salt, to taste
- pepper, to taste
- 2 tablespoons olive oil
- 4-6 sliced apples
- Preheat oven to 350 F and line sheet pan with parchment paper. Set aside.
- Remove pork from packaging and pat dry with paper towel. Season all sides with salt and pepper, to taste.
- To make glaze: In bowl, whisk apple cider vinegar glaze, mustard, balsamic vinegar, rosemary, sage, thyme and garlic. Add salt and pepper, to taste. In steady stream, slowly add olive oil to emulsify while whisking.
- In large skillet, heat oil over medium-high heat. Sear pork loin 2-3 minutes on each side.
- Move pork to lined baking sheet and brush on about half the glaze. Roast 30 minutes.
- Remove pork from oven and spread sliced apples around pork loin. Brush remaining glaze over pork and apples. Bake 20-30 minutes, or until internal temperature reaches 150 F.
- Let pork loin rest at least 10 minutes before slicing.

Stuffing-Filled Pork Chops
Prep time: 10-15 minutes
Cook time: 30-45 minutes
Servings: 6
Stuffing:
- 1 small box biscuit mix
- 1 stick butter
- 2-3 stalks finely diced celery
- 1 finely diced onion
- 1 teaspoon poultry seasoning
- 1-2 cups chicken broth
- 1 bag cornbread stuffing mix
- 2 eggs, beaten
- salt, to taste
- pepper, to taste
- 6 Coleman Natural bone-in or boneless pork chops
- oil
- 1 teaspoon minced garlic
- 1 teaspoon minced sage
- 1 teaspoon minced thyme
- 1 teaspoon minced rosemary
- To make stuffing: Bake biscuits according to package directions 1 day ahead. Dry biscuits will absorb more broth.
- Preheat oven to 350 F.
- In skillet, melt butter then add celery and onions. Saute until onions are translucent then add poultry seasoning and half the broth. Set aside to cool.
- In bowl, combine stuffing mix, crumbled biscuits and eggs.
- Add onion mix to bowl and mix well. Add leftover broth if mixture is too dry. Set aside.
- Slit each chop on rounded side, cutting almost through to bone, to create deep pockets for stuffing.
- Season chops with garlic, sage, thyme and rosemary. Fill each chop with stuffing mixture. Use toothpicks to keep chops closed.
- Preheat skillet with oil over medium-high heat and sear each chop 2-3 minutes on each side.
- Once chops are seared, add remaining stuffing to pan, cover with foil and bake 30-45 minutes until chops reach 140 F in center. Remove foil for last 10 minutes to brown top of stuffing, if desired.
SOURCE:
Coleman Natural Foods
At our core, we at STM Daily News, strive to keep you informed and inspired with the freshest content on all things food and beverage. From mouthwatering recipes to intriguing articles, we’re here to satisfy your appetite for culinary knowledge.
Visit our Food & Drink section to get the latest on Foodie News and recipes, offering a delightful blend of culinary inspiration and gastronomic trends to elevate your dining experience.


recipes
Transform Leftover Halloween Candy Into Creative Brownies
Transform Leftover Halloween Candy: Once all the trick-or-treaters have filled their pumpkin totes and the porch lights have turned off, many American households are stocked with an abundance of sweet treats in the aftermath of a successful Halloween. Make them even sweeter by using those chocolates and cookies as decorations on a tray of brownies to share with family, friends or coworkers.

Transform Leftover Halloween Candy Into Creative Brownies
(Feature Impact) Once all the trick-or-treaters have filled their pumpkin totes and the porch lights have turned off, many American households are stocked with an abundance of sweet treats in the aftermath of a successful Halloween. Make them even sweeter by using those chocolates and cookies as decorations on a tray of brownies to share with family, friends or coworkers.
Chocolatey treats work best for this recipe but the specifics are up to you. Whether you use one kind of candy for the whole tray, decorate each section with a different variety, combine them all for a flavor explosion or let the kids decide, this is a fun way to enjoy the sugary bounty. Avoid using gummy, chalky or hard candy.
You’ll add most of the candy to the top of the brownies after baking, but you can also toss a few pieces into the bottom of the pan before pouring in the batter if you’d like some extra surprises in each bite.
Find more seasonal recipe inspiration at Culinary.net.

Leftover Halloween Candy Brownies
Recipe adapted from Sarah’s Day Off
Prep time: 20 minutes
Cook time: 40 minutes
Servings: 9
- 2 cups leftover Halloween candy, chopped
- nonstick cooking spray
- 6 ounces bittersweet baking chocolate, broken into pieces
- 10 tablespoons unsalted butter
- 3 large eggs, at room temperature
- 1 cup light brown sugar
- 1/2 cup granulated sugar
- 1/2 teaspoon kosher salt
- 1 teaspoon pure vanilla extract
- 1/2 cup all-purpose flour
- 1/4 cup Dutch-processed cocoa powder
- Transfer chopped candy pieces to container and freeze.
- Preheat oven to 350 F. Grease 8-inch square pan with nonstick cooking spray, line with parchment paper and grease again.
- In small saucepan, add baking chocolate pieces and butter. Melt slowly over low heat, stirring occasionally, until completely smooth.
- Using stand or hand mixer on medium-high speed, beat eggs, brown sugar and granulated sugar 3 minutes.
- Scrape down mixing bowl. Set speed to low and gently pour in melted chocolate and butter mixture. Increase speed to medium and beat until mixture is completely combined. Beat in salt and vanilla. Scrape down sides and bottom of bowl.
- Using rubber spatula or spoon, gently fold in flour and cocoa powder until mixture is smooth. Transfer batter to prepared pan and spread evenly.
- Bake 40-50 minutes, or until center is set. Immediately press frozen candies into top of brownies, arranging as desired.
- Refrigerate pan 2 hours, or until cool, then slice into nine equal brownies.
Photo courtesy of Unsplash

SOURCE:

Food
NESTLÉ® TOLL HOUSE® Drops a 12-Day Advent Calendar for Holiday Baking
Nestlé Toll House is releasing its first-ever 12 Days Advent Calendar featuring new Snowflake Cookie Dough and Snowflake Morsels plus classic favorites. Drops Oct. 9, Nov. 6, and Dec. 4 for $29.99.
Holiday baking season is getting a new countdown tradition. NESTLÉ® TOLL HOUSE® has announced its first-ever 12 Days of NESTLÉ® TOLL HOUSE® Advent Calendar, a limited-edition set built to help families bake, share, and make memories in the kitchen—one surprise at a time.
Designed in the shape of a house inspired by the original Toll House Inn, the calendar is meant to sit on a countertop as part of the seasonal setup. It features 12 numbered doors that also double as festive holiday cards, with each day revealing a corresponding NESTLÉ TOLL HOUSE product.
What’s inside the 12-day calendar
Instead of mini candies, this calendar leans into what the brand is known for: cookie dough and morsels. The lineup includes two new holiday innovations plus a mix of familiar favorites.
Two new holiday innovations
- NEW! NESTLÉ® TOLL HOUSE® Snowflake Morsels: Snowflake-shaped morsels designed to bake into holiday treats or sprinkle on top as a decorative finish for cookies, brownies, bark, and more.
- NEW! NESTLÉ® TOLL HOUSE® Snowflake Cookie Dough: Sugar cookie dough with snowflake-shaped morsels mixed in for a winter-ready twist.
Ten favorites and festive classics
- NESTLÉ® TOLL HOUSE® Santa’s Cookie Dough
- NESTLÉ® TOLL HOUSE® Peppermint Cocoa Cookie Dough
- NESTLÉ® TOLL HOUSE® Chocolate Chip Cookie Dough
- NESTLÉ® TOLL HOUSE® Holiday Chocolate Chip Cookie Dough
- NESTLÉ® TOLL HOUSE® Milk Chocolatey Flavored Football Morsels
- NESTLÉ® TOLL HOUSE® Butterscotch Artificially Flavored Morsels
- NESTLÉ® TOLL HOUSE® Semi-Sweet Chocolate Morsels (made with 100% real chocolate)
- NESTLÉ® TOLL HOUSE® Milk Chocolate Mini Morsels
- NESTLÉ® TOLL HOUSE® Dark Chocolate Morsels
- NESTLÉ® TOLL HOUSE® Chocolate Chip Remix Oatmeal Chocolate Chip Cookie Dough
Why this fits the season
For STM Daily News readers, the appeal is pretty straightforward: it’s a ready-made holiday baking starter kit that also functions as a festive countertop display. It’s positioned as a way to spark new traditions—whether that’s a nightly bake-and-watch routine, a weekend cookie swap prep session, or quick treats for school and office parties.
In the announcement, Melanie Knoke, Sr. Marketing Manager at NESTLÉ TOLL HOUSE, said the calendar is meant to bring the brand’s long-running “bake, share and celebrate” spirit into a new format, combining seasonal newcomers with classic staples.
How to buy it (drop dates + price)
The 12 Days of NESTLÉ® TOLL HOUSE® Advent Calendar is priced at $29.99 and will be available exclusively at tollhouse.com/adventcalendar in three limited drops. Each drop goes live at 2 p.m. ET:
- October 9
- November 6
- December 4 (National Cookie Day)
Quantities are limited, and the brand notes that fans should act quickly when each drop opens.
What to watch for
Advent calendars have been expanding beyond candy into “experience” categories—beauty, coffee, and now baking ingredients. This release is a good example of that shift: it’s not just a countdown, it’s a built-in reason to get into the kitchen multiple times during the season.
For more information, NESTLÉ® TOLL HOUSE® directs fans to VeryBestBaking.com and its social channels, including @TollHouse on Facebook.
Source (press release):
- PRNewswire — NESTLÉ® TOLL HOUSE® Launches First-Ever Advent Calendar for the Holiday Season” (Oct. 5, 2026)
Related links:
- Advent calendar purchase page: https://tollhouse.com/adventcalendar
- Brand hub / baking resources: https://www.verybestbaking.com/toll-house/
- Nestlé USA company info: https://www.nestleusa.com
recipes
Celebrate the Return of Fall with One-Pot Ratatouille Spaghetti
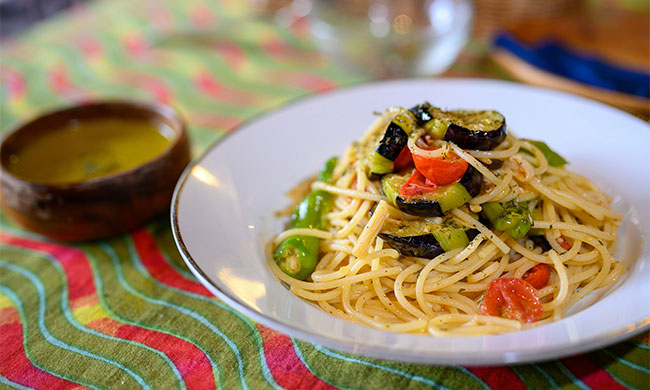
As the seasons change, you don’t have to overhaul all your meal plans immediately. Usher in the arrival of autumn with recipes like Ratatouille Spaghetti that blend fresh, summery produce with warm fall flavors.
Celebrate the Return of Fall with One-Pot Ratatouille Spaghetti
(Feature Impact) As the seasons change, you don’t have to overhaul all your meal plans immediately. Usher in the arrival of autumn with recipes that blend fresh, summery produce with warm fall flavors.
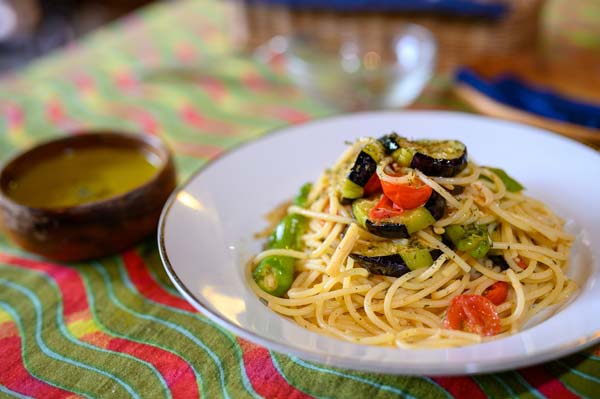
This Ratatouille Spaghetti recipe is a perfect way to make the most of those last few harvests from the garden or trips to the farmer’s market. Create layers of rich flavor by taking your time with each vegetable – first browning the eggplant then softening the zucchini and tomatoes before adding flavorful aromatics like garlic and thyme to make the whole house smell delicious. The addition of chickpeas or cannellini beans boosts the protein and fiber in the meal, and you can use a high-protein or whole-grain pasta for even more nutrition.
The best part is, while this meal might taste gourmet, you can have it ready in less than an hour – and leave yourself with only one pot to wash afterwards. Even if it’s a school night, it only takes a few extra steps to make a spaghetti dinner feel a little fancier.
Discover more seasonal recipes at Culinary.net.
Ratatouille Spaghetti
Recipe adapted from Serious Eats
Total time: 50 minutes
Servings: 6
- 1/2 cup extra-virgin olive oil, divided
- 1 pound unpeeled eggplant, cut into 1-inch pieces
- 4 1/2 teaspoons kosher salt, divided
- 2 large zucchini, divided
- 1 small yellow onion, chopped
- 6 cloves garlic, finely minced
- 1 tablespoon chopped fresh thyme
- 1/2 teaspoon crushed red pepper flakes
- 1 can (12 ounces) chickpeas or cannellini beans, drained and rinsed
- 4 1/2 cups water
- 1 cup jarred tomato puree
- 12 ounces dried spaghetti
- 1 orange, yellow or red bell pepper, cut into 1-inch pieces
- 3 medium tomatoes, cut into 1/2-inch pieces
- 1 cup packed fresh basil leaves, roughly torn
- lemon juice, to taste
- In large Dutch oven or stovetop pot, heat 1/4 cup oil over medium heat until shimmering. Add eggplant and 1/2 teaspoon kosher salt; cook 8-12 minutes, stirring occasionally, until deeply browned and softened. Transfer to medium bowl and set aside. Wipe pot clean if remaining browned bits are starting to burn.
- Cut one zucchini into 1-inch pieces. In now-empty pot, heat remaining oil over medium heat until shimmering. Add zucchini pieces, onion and 1/2 teaspoon salt; cook about 6 minutes, stirring occasionally, until zucchini is browned and softened. Stir in garlic, thyme and red pepper; cook about 30 seconds, stirring constantly, until fragrant. Stir in reserved eggplant and chickpeas or cannellini beans.
- Add water, tomato puree and remaining salt to pot then bring to simmer over medium-high heat. Add spaghetti, reduce heat to medium-low, cover pot and cook about 8 minutes, stirring often to prevent sticking, until spaghetti is almost al dente.
- Cut remaining zucchini into 1/2-inch pieces. Add zucchini pieces and bell pepper to spaghetti and cook 6-8 minutes, covered, over medium-low heat, stirring often, until pasta is al dente and vegetables are tender. Stir in fresh tomatoes and basil; remove from heat.
- Divide evenly among six bowls. Finish with squeeze of lemon juice for extra brightness, to taste, and garnish with extra olive oil, basil and crushed red pepper, if desired.
Photo courtesy of Unsplash

SOURCE: