home improvement
DIY Home Upgrades to Add Style and Beauty

Last Updated on September 13, 2025 by Rod Washington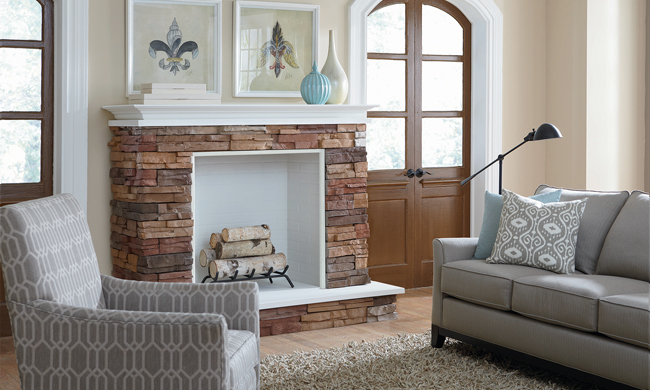
(Family Features) Home upgrades are necessary for a variety of reasons, but many homeowners look to update their homes to add comfort and beauty. While a complete renovation can be appealing, it can also be costly and time consuming.
However, if you’re willing to take on some of the work yourself, there are ways to upgrade your living spaces to add style (and value) without the assistance of a contractor. Consider these DIY ideas to spruce up your home’s aesthetics and create a more attractive place to live.
Freshen Up Paint
When it comes to simple DIY projects, a new coat of paint can drastically update your spaces without making major renovations. Light colors like gray, beige or white can make smaller spaces feel more open while darker shades like navy and purple can create a dramatic look. If you don’t want (or need) to paint the entire room, adding a pop of color with an accent wall or touching up the trim are quick and easy improvements. Adding paint to a less traditional spot like the ceiling or refreshing cabinets with a new color can also help bring your spaces to life.
Install Mess-Free Stone Accents
If you’re looking to add warmth and texture, easy-to-install stone veneer can provide the look of natural stone without the expense. A mortarless option like ClipStone is designed to be installed with screws and common tools, making it easy to achieve the look of traditional masonry without the hassle and mess. Durable and low maintenance, you don’t have to worry about sealing or painting and it’s a perfect option for exterior or interior installation that can be installed in any weather conditions. Available in a variety of styles and colors, homeowners can mix and match to create a custom look. Plus, it features a built-in water management system, overlapping edges to minimize gaps, reversible outside corners and a variety of available accessories.
Upgrade Window Treatments
Windows can often be overlooked or left with the simple paper shades or aluminum blinds the builder initially installed. Consider replacing them with plantation shutters, wooden blinds or drapes that better suit the style of the room. In addition to blinds, curtains provide another opportunity to add design elements that align with your tastes. From geometric panels to sheers, the possibilities are nearly endless. Or simply match the curtain panels to the color of your walls or an accent color for a look that can match almost any style.
Update Accessories
Cabinet pulls, outlet covers, curtain rods, switch plates and doorknobs are easily ignored, but replacing them can be an inexpensive way to add small touches of elegance to your home. With a variety of designs and finishes to choose from, including bronze, brushed nickel, copper and stainless steel, updating worn pull handles and knobs can create an affordable look that appears expensive. The same is true for metal switch covers and outlet plates. While decorative curtain rods may be on the pricier side, adding a coat of paint in a metallic finish could provide a cheaper alternative.
Improve Curb Appeal
There are a multitude of inexpensive ways to give your home’s exterior a makeover. Start by pressure washing your siding and windows, which can make your house look almost as good as a fresh coat of paint for a fraction of the time and money. Remember to also clean your driveway, patio and walkways to maximize your investment. Pulling weeds, trimming trees and bushes, and patching bald spots in the yard can also go a long way as can planting greenery in front of your home and making landscaping upgrades like adding mulch beds, water features or decorative edging. Another idea: replace your front door or give it a fresh coat of paint to add a pop of color to your porch.
Find more ideas for improving your living spaces at myclipstone.com.
DIY Home Upgrades to Add Style and Beauty
SOURCE:
Cornerstone Building Brands
https://stmdailynews.com/category/consumer-corner


Consumer Corner
Getting Your Wood-Burning Fireplace Ready for Winter
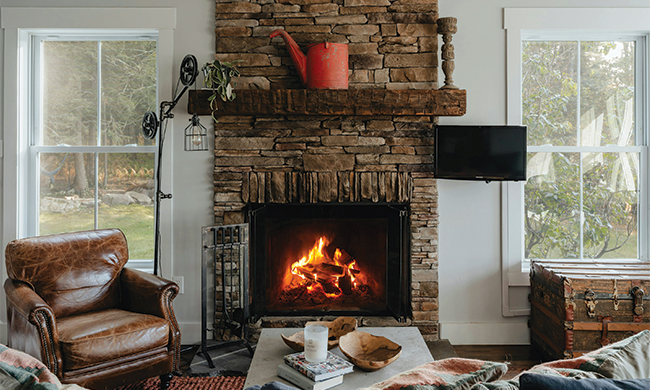
As cold temperatures creep in, you might be dreaming about cozy fall and winter evenings in front of a glowing, crackling fireplace. Before you (literally) fire it up for the first time, consider these steps to make sure your wood-burning fireplace is ready to heat your home cleanly, safely and efficiently.
Getting Your Wood-Burning Fireplace Ready for Winter
(Feature Impact) As cold temperatures creep in, you might be dreaming about cozy fall and winter evenings in front of a glowing, crackling fireplace. Before you (literally) fire it up for the first time, consider these steps to make sure your wood-burning fireplace is ready to heat your home cleanly, safely and efficiently.
Clear Out Old Ash and Debris
When you haven’t used your fireplace for a while, it can build up dust, soot and debris. As the first step of your annual checkup, clean out last season’s leftovers but leave about a 1-inch layer of ash at the bottom of the firebox to provide insulation and make it easier to get wood burning.
Schedule Professional Maintenance
Chimney sweeps still exist, although they don’t look like the soot-smudged lads from old movies anymore – and these days they come with a collection of high-powered modern tools to remove buildup from chimneys and flue systems. Experts can also look for ventilation issues, cracks in the masonry and other potential hazards. The National Fire Protection Association recommends getting your chimney inspected once a year and cleaned or maintained as needed.
Consider Efficiency Upgrades
To keep your fireplace working better for longer or improve its energy efficiency, explore your options for upgrades suited to your fireplace type. Glass fireplace doors, new dampers or a high-efficiency fireplace insert can all help reduce energy loss and improve heating performance. Adding or replacing a chimney cap and applying waterproof sealant to the bricks every five years can help protect your chimney from moisture damage over time.
Burn the Right Kind of Wood
Not all wood burns alike, so you can improve the warmth and efficiency of your fires simply by choosing the right kinds of logs. Stock up on seasoned hardwood dried for 6-12 months and store it in a dry, well-ventilated area away from your home so it doesn’t attract pests like mice who may want to take up residence. Avoid burning painted or treated lumber, wet wood or household trash, which can produce excess smoke and harmful pollutants.
Use Safe Fireplace Equipment
Beyond the fireplace itself, check your setup and tools to make sure you have everything you need to safely start and maintain your fires. If you have an open fireplace, make sure to use a sturdy fireplace screen to contain any stray sparks. A good-quality poker, tongs, shovel and brush can also help you control logs and embers, manage ash and keep your fireplace clean throughout the season.
Discover more home maintenance and upgrade ideas at eLivingtoday.com.
Photo courtesy of Unsplash
SOURCE:

6 Ways to Create a More Sustainable Bathroom
(Feature Impact) Conserving water, energy and resources is key to running an environmentally friendly household, and one of the best places to start is your bathroom. As one of the most frequently used rooms in the house, it’s a small space that makes a big difference. Every flush, shower, twist of the tap and restock of restroom essentials is an opportunity to manage your ecological footprint.
The good news is you don’t need a full-scale remodel to make your bathroom more efficient. Small changes to daily habits, routine maintenance and upgraded plumbing fixtures can all have a valuable impact. By making thoughtful choices at home now, you can protect your community’s freshwater supplies, consume less energy and help create a more sustainable future.
For useful ways to save water, conserve energy and reduce waste, consider these tips from the bathroom design and sustainability experts at TOTO.
Fix Leaks Before They Waste More Water
From dripping faucets to worn toilet flappers, small leaks can quickly add up. In fact, according to the EPA, the average household wastes approximately 9,400 gallons of water each year due to leaks. That can mean money going down the drain, too: If you notice your water bill is increasing and can’t figure out why, a hidden leak could be responsible.
To test whether your toilet has a silent leak, try adding a dye tablet or a few drops of food coloring to the tank. If color seeps into the bowl before you’ve flushed (usually within 10 minutes), it likely means an issue with the flapper. Many leaks are easy fixes, but a trained plumbing professional can give you more specific guidance.
Choose Water-Efficient Fixtures
Upgrading your plumbing fixtures can make an immediate difference, particularly when you choose EPA WaterSense-labeled models designed to save water without sacrificing performance. The water-efficiency specialists at TOTO helped shape the product-performance standards for the program, which turns 20 this year.
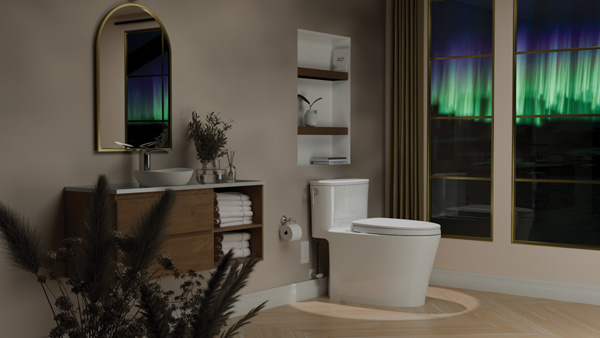
Its toilets pair elegant design with water-saving performance and no compromises on power. They are designed to use either 1.0 or 1.28 gallons per flush (GPF), representing water savings of 37.5% or 20%, respectively, compared with the federal standard of 1.6 GPF. Whether you’re looking for the Aurora’s elegant sculptural design, the Redington’s clean architectural lines or the Glaston’s timeless two-piece look, each model features powerful, gravity-driven flush performance and an ultrasmooth ceramic bowl glaze for easy cleaning, all while using less water.
Cut Paper and Single-Use Waste
Next time you’re ready to restock your bathroom cabinets, consider some simple eco-friendly product swaps. Look for toilet tissue made with recycled or sustainable materials or consider adding a bidet to reduce paper use – and never flush anything except toilet paper, even wipes labeled “flushable.” Instead of buying soap and personal care products in single-use packaging, you can lower your plastic consumption by choosing refillable containers. When possible, opt for a stash of washable cloths for cleaning rather than relying on disposable wipes and paper towels.
Take Shorter Showers and Make Every Gallon Count
Spending less time in the shower is one of the most impactful things one person can do to save water. Showering accounts for nearly 17% of residential indoor water use, according to the EPA, and if you prefer warm showers, that also means using energy to heat the water.
Make a habit of staying in the shower long enough to complete your routine but not lingering beyond that. To make each minute more water-efficient, consider upgrading to TOTO’s 2-Mode Showerhead, available in stylish round and square designs. Its efficient 1.75 GPM flow is paired with Comfort Wave for a stimulating experience and Warm Spa for soothing, enveloping warmth. You can also save water by turning off the tap while you lather with soap and shampoo, a technique sometimes referred to as a “Navy shower.”
Ventilate Efficiently to Control Moisture
Keeping your bathroom and the rest of your home in good condition relies in large part on controlling moisture and humidity. Use exhaust fans to vent moist air outside – not just into an attic or another enclosed space where it can cause damage, rot or mold. You can also use smart home features like humidity sensors and timers to control ventilation without running the fan longer than necessary.
Maintain Fixtures for a Longer Life
By taking good care of your bathroom fixtures, you can extend their longevity, thereby saving resources compared to replacing them more frequently. Follow manufacturers’ care instructions for cleaning and maintenance, avoiding abrasive cleaners that may wear away finishes. Aim to proactively remove any mineral buildup on faucets and showerheads, since it can reduce water flow and prematurely age your fixtures.
Keep an eye on serviceable components that tend to wear out – such as seals, faucet cartridges and toilet fill components – and see if you can fix or replace them individually first. When the time comes to upgrade toilets, sinks and showers, choose high-quality options you’ll be happy to have in your home for years to come.
Learn more about sustainable bathroom fixtures at TotoUSA.com.
SOURCE:
home gardening
Beyond the Leaf Pile: 4 Tips for Autumn Lawn Care
4 Tips for Autumn Lawn Care: Many people associate fall yardwork with raking up the crispy, colorful leaves that have drifted down from surrounding trees. Don’t let that be the only task on your outdoor agenda, however, because this season is also an opportunity to improve the overall health of your lawn so it’s ready to thrive once spring arrives.
Beyond the Leaf Pile: 4 Tips for Autumn Lawn Care
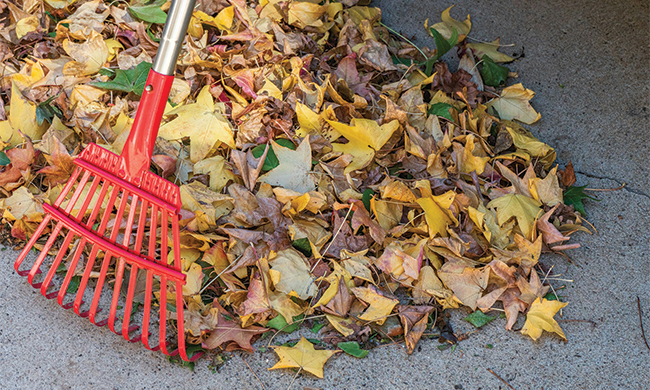
(Feature Impact) Many people associate fall yardwork with raking up the crispy, colorful leaves that have drifted down from surrounding trees. Don’t let that be the only task on your outdoor agenda, however, because this season is also an opportunity to improve the overall health of your lawn so it’s ready to thrive once spring arrives.
Start with these autumn lawn care tips:
- Continue Mowing
As long as the grass keeps growing, homeowners should keep mowing – with a couple of smart seasonal adjustments. First, lower the mower height for your final two cuts so the grass isn’t too tall going into winter. Second, instead of raking all the leaves up beforehand, think about leaving a layer on the lawn so the mower can shred them and effectively turn them into mulch, returning their nutrients to the soil.
- Fertilize the Lawn
Especially if you grow cool-weather grass varieties like rye or fescue, feeding your lawn can actually be most effective in the fall. Fertilizer helps nourish the roots of your grass, strengthening it through the winter and preparing it to grow lush and green in the spring and summer. Aim to feed it once in the beginning of the season then again 6-8 weeks later or according to the recommended schedule for your region.
- Battle Stubborn Weeds
If you’ve been dealing with perennial weeds throughout the summer, fall could mean your chance to get rid of them once and for all. Weeds absorb herbicides readily on days with moderate temperatures and moist soil, so this task might be well-timed after some autumn rain has fallen.
- Add Grass Seed to Thin Spots
Whether you have bare patches on your lawn or areas of thinning grass, fall is the best time to seed cool-season lawns. (Skip this tip if you live in the South and have a warm-season lawn.) At least six weeks before the first hard frost in your area, spread grass seed over the areas you want to replenish or thicken then keep the lawn consistently watered until it germinates. Aerating the soil first can help the seed take root.
Find more seasonal home and garden tips by visiting eLivingtoday.com.
Photo courtesy of Unsplash
SOURCE: