Food and Beverage
Flavorful Grape Recipes to Take Summer Gatherings to the Next Level

Last Updated on July 23, 2024 by Daily News Staff
(Family Features) Summertime celebrations with friends, family and neighbors are a perfect way to enjoy the sunshine, warm weather and camaraderie. To satisfy a hungry crowd, though, you’ll need recipes fit for the occasion.
Turn to a versatile signature ingredient like Grapes from California, which can be used in dishes of all kinds from refreshing salads and entrees to flavorful condiments and sweet desserts. Grapes are crisp, juicy and sweet, making them a fantastic addition of flavor and texture for a wide range of recipes. Whether fresh, sauteed, roasted, grilled or even pickled, grapes make it easy to take meals to the next level.
For example, you can start the festivities with grapes as an easy, portable and healthy snack perfect for summer days or use them as a juicy addition to this all-in-one Honey-Lime Quinoa and Grape Salad that’s ideal as a light appetizer or a meal all on its own. Follow it up (or pair it) with a summertime staple – hot dogs – given a sweet-tart twist from pickled grape relish that takes these Sweet and Tangy Pickled Grape Hot Dogs to new heights.
Dessert can’t be much easier than Creamy Vegan Grape Ice Cream as a dairy-free alternative to traditional summer sweets. Oat coffee creamer and pureed grapes are all you need to create this delicious frozen treat. Simply freezing whole grapes also makes for an easy and healthy frozen dessert.
Visit GrapesFromCalifornia.com to discover more summer entertaining inspiration.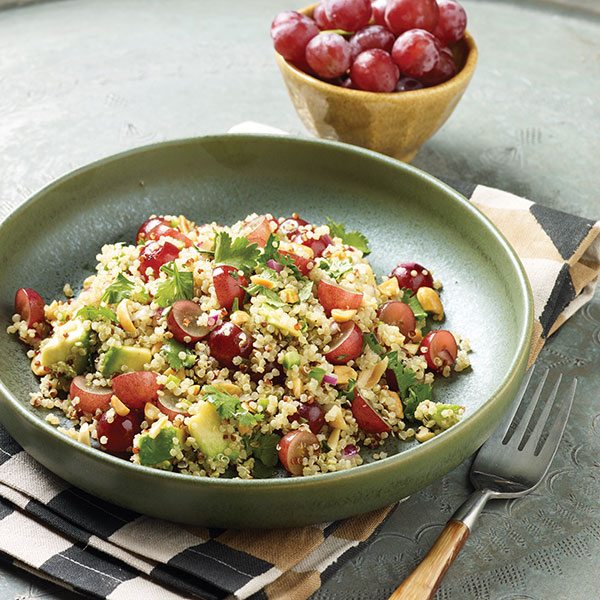
Honey-Lime Quinoa and Grape Salad
Prep time: 15 minutes, plus at least 1 hour chill time
Cook time: 22 minutes
Servings: 6 (1 1/3 cups per serving)
Lime Vinaigrette:
- 1/2 cup extra-virgin olive oil
- 1/3 cup lime juice
- 2 tablespoons honey
- 3/4 teaspoon sea salt
- freshly ground pepper, to taste
Salad:
- 1 1/2 cups quinoa
- 2 cups vegetable broth
- 2 cups halved Grapes from California
- 1/2 cup minced red onion
- 1/4 cup chopped fresh cilantro
- 2 tablespoons minced jalapeno pepper
- 1 large firm, ripe avocado, peeled, pitted and cut into bite-size pieces
- 1/2 cup chopped peanuts (optional)
- To make lime vinaigrette: In medium bowl, whisk olive oil, lime juice, honey, sea salt and pepper, to taste.
- To make salad: In fine mesh strainer, rinse quinoa; drain well. In medium saucepan, bring broth and quinoa to boil; reduce heat and simmer, covered, 12 minutes. Remove from heat and let stand 10 minutes then fluff with fork and let cool. Transfer to large bowl.
- Pour vinaigrette over quinoa; stir well to coat. Add grapes, onion, cilantro and jalapeno pepper; cover and chill at least 1 hour.
- Lightly stir in avocado and transfer to decorative bowl. Sprinkle with nuts, if desired.
Notes: Salad may be prepared and refrigerated up to 2 days ahead without avocado and peanuts. Add avocado and peanuts just before serving.
Nutritional information per serving: 520 calories; 10 g protein; 52 g carbohydrates; 32 g fat (55% calories from fat); 4 1/2 g saturated fat (8% calories from saturated fat); 0 mg cholesterol; 490 mg sodium; 7 g fiber.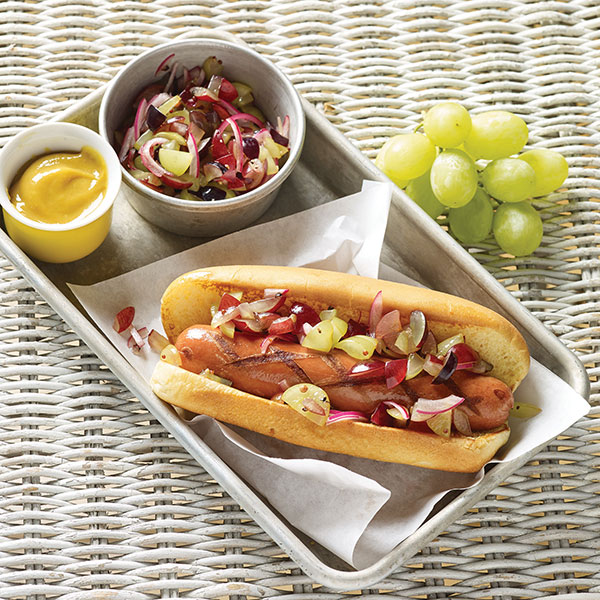
Sweet and Tangy Pickled Grape Dogs
Prep time: 15 minutes, plus 1 hour marinating time
Cook time: 5 minutes
Servings: 8 (1/4 cup relish per serving)
- 1/2 teaspoon mustard seeds
- 1/2 teaspoon coriander seeds
- 1/2 teaspoon black peppercorns
- 1/2 cup wine vinegar
- 1/4 cup packed brown sugar
- 2 1/4 cups quartered or coarsely chopped Grapes from California (red, green, black or combination)
- 1/4 cup thinly sliced red onion
- 8 turkey or chicken hot dogs
- 8 hot dog buns, lightly toasted
- Place mustard seeds, coriander seeds and black peppercorns in small resealable bag. Using meat mallet or rolling pin, crush seeds and peppercorns.
- In small saucepan, stir vinegar, sugar, seeds and peppercorns; bring to boil. Remove from heat and stir to dissolve sugar; let cool. Stir in grapes and onion; set aside to cool and marinate 1 hour, stirring occasionally.
- Heat grill to medium heat.
- Grill hot dogs 5 minutes, turning occasionally, or until charred and heated through.
- Place hot dogs in buns. Using slotted spoon, top with pickled grapes.
Nutritional information per serving: 280 calories; 10 g protein; 39 g carbohydrates; 10 g fat (32% calories from fat); 2 g saturated fat (6% calories from saturated fat); 35 mg cholesterol; 630 mg sodium; 1 g fiber.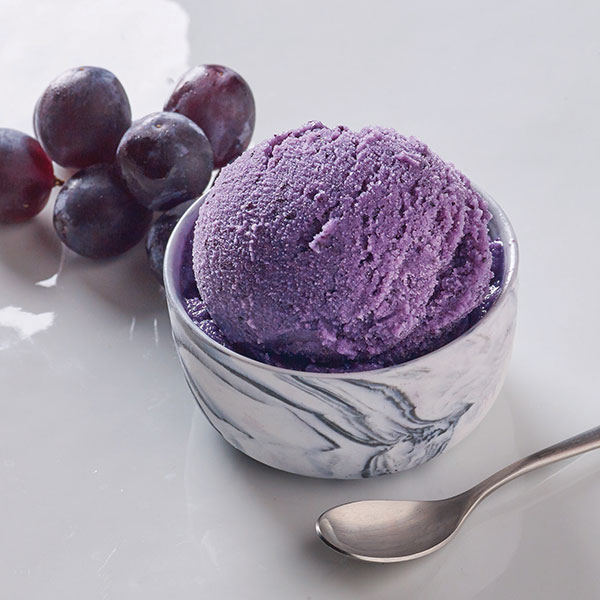
Creamy Vegan Grape Ice Cream
Prep time: 20 minutes
Cook time: 10-15 minutes
Servings: 8 (1/2 cup per serving)
- 1 pound stemmed black Grapes from California
- 12 ounces vanilla oat coffee creamer, well chilled
- 12 ounces unsweetened oat coffee creamer, well chilled
- In high-speed blender, puree grapes until smooth. Transfer to medium saucepan and bring to simmer. Reduce heat to low and cook 10-15 minutes, or until reduced to 1 cup. Cover and refrigerate until well chilled.
- Stir creamer into pureed grapes and pour into bowl of ice cream maker. Freeze according to manufacturer’s directions. Transfer to freezer-safe container; cover and freeze until firm.
Substitution: For lighter color, use 3/4 pound black grapes and 1/4 pound red.
Note: Make sure ice cream maker bowl is well chilled or frozen before making ice cream.
Nutritional information per serving: 140 calories; 0 g protein; 22 g carbohydrates; 6 g fat (39% calories from fat); 0 g saturated fat; 0 mg cholesterol; 45 mg sodium; 1 g fiber.
SOURCE:
California Table Grape Commission


Food and Beverage
Jack-o’-Lantern Stuffed Peppers Prove Fun Isn’t Just for Pumpkins
These Jack-o’-Lantern Stuffed Peppers give you a Halloween-themed, kid-approved way to put vegetables on the dinner table.
Recipes:
Jack-o’-Lantern Stuffed Peppers
Jack-o’-Lantern Stuffed Peppers Prove Fun Isn’t Just for Pumpkins
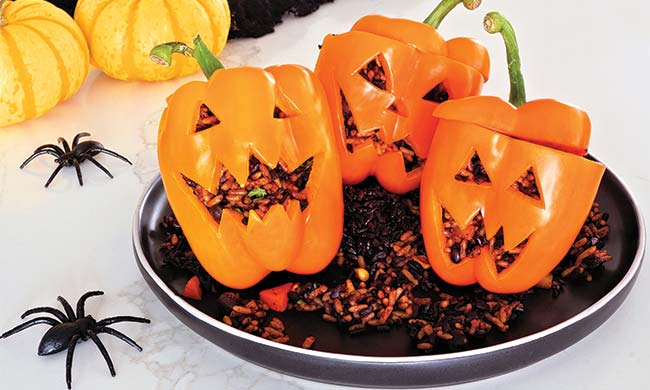
(Feature Impact) Jack-o’-lantern carving is a cherished fall tradition – but pumpkins aren’t the only vegetables you can decorate with fun, spooky or scary faces. These Jack-o’-Lantern Stuffed Peppers give you a Halloween-themed, kid-approved way to put vegetables on the dinner table.
Filled with savory ground turkey, brown rice, melty cheese and warm, savory spices, these peppers taste as autumnal as they look. It’s simple to customize the filling to your family’s tastes, and you can even make the meal interactive by inviting kids to choose their own pepper colors and carve their own expressions.
Find more Halloween and seasonal recipes at Culinary.net.
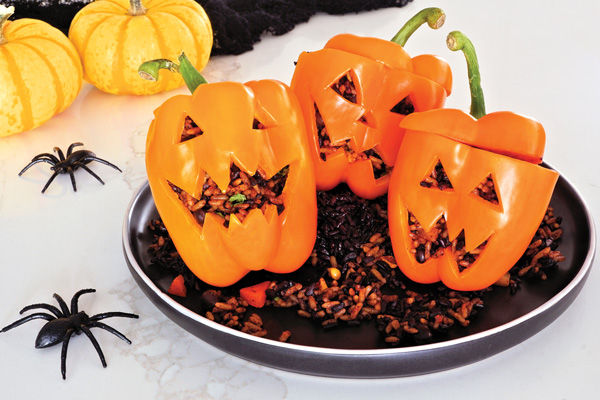
Jack-o’-Lantern Stuffed Peppers
Recipe adapted from AllRecipes
Prep time: 15 minutes
Cook time: 45 minutes
Servings: 4
- 1 teaspoon olive oil
- 1 pound ground turkey
- 3 cloves garlic, minced
- 1/2 medium onion, diced
- 1 teaspoon garlic powder
- 1 teaspoon cumin
- 4 large orange bell peppers
- 1 cup cooked brown rice
- 1 cup grated sharp cheddar cheese
- 2 teaspoons kosher salt
- 1/2 teaspoon ground black pepper
- cayenne pepper, to taste
- cups seasoned tomato sauce, warmed
- Preheat oven to 400 F and coat 9-by-13-inch baking dish with olive oil.
- In skillet, brown ground turkey with minced garlic, onion, garlic powder and cumin until meat is cooked, 4-5 minutes.
- With small knife, cut eyes, nose and mouth into flattest side of each pepper to resemble jack-o’-lantern. Cut around seed pods and remove pepper tops, trimming and discarding any seeds from under stems then setting tops aside. Trim white membranes from inside each pepper and shake out seeds. Place peppers in prepared baking dish.
- In bowl, combine turkey mixture with cooked rice, cheddar cheese, salt, black pepper and cayenne pepper, to taste.
- Divide and stuff mixture into peppers; cover with reserved pepper tops.
- Wrap baking dish loosely with aluminum foil and bake until peppers are tender, about 45 minutes.
- Spoon about 3 tablespoons warm tomato sauce onto each plate; place stuffed peppers on top. Serve remaining sauce on side.
Photo courtesy of Shutterstock

SOURCE:
Food and Beverage
Serve Up Smiles with Favorite Holiday Sides
Turkey and ham may sit centerstage, but classic holiday sides can make the season truly special. You can bring smiles to your loved ones’ faces by dishing out those favorite recipes everyone asks for year after year.
(Family Features) Turkey and ham may sit centerstage, but classic holiday sides can make the season truly special. You can bring smiles to your loved ones’ faces by dishing out those favorite recipes everyone asks for year after year.
Made with a delicious combination of rice, cheddar cheese, cream of mushroom soup and broccoli florets, this quick and easy version of Broccoli and Cheese Rice Casserole is an ideal one-pot dish to keep the holidays simple. With three easy steps and everyday ingredients, it comes together with minimal effort for traditional casserole taste.
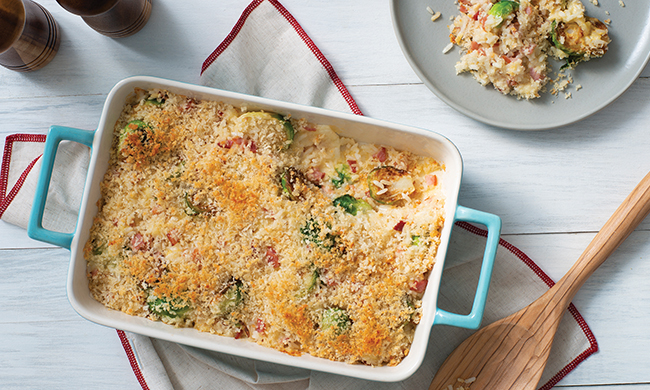
When it comes to feeding a crowd, it’s often best to let your oven do the work. This Brussels Sprouts and Ham Rice Gratin recipe allows you to serve up a filling favorite with little effort using pantry staples. Plus, it’s a kid-friendly way to encourage veggies at this year’s holiday meal with gooey cheese providing tempting taste bud motivation.
These seasonal classics and more are made quick and easy with an option like Success Boil-in-Bag Rice, a pre-measured, mess-free way to make fluffy, high-quality rice. It’s cooked by simply dropping a bag of rice in a pot of water or broth then boiling it for 10 minutes. BPA-free and FDA-approved, the bags are safe to use and made to withstand high temperatures.
An added bonus: If you’re aiming to achieve a particular flavor, just season the rice by cooking in water infused with herbs, spices, broth, coconut milk or other liquids like juice for sweeter recipes.
Visit SuccessRice.com to find more holiday recipe inspiration.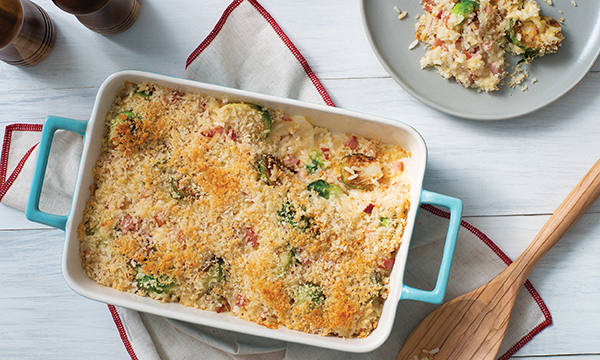
Brussels Sprouts and Ham Rice Gratin
Prep time: 20 minutes
Cook time: 25 minutes
Servings: 4
- 1 bag Success White Rice
- 1/2 pound Brussels sprouts, trimmed and halved
- 1/3 cup diced ham
- 1 clove garlic, minced
- 1 tablespoon olive oil
- 3/4 teaspoon salt, divided
- 3/4 teaspoon black pepper, divided
- 1 cup heavy cream
- 2 tablespoons finely chopped fresh chives
- 2 tablespoons Dijon mustard
- 1 cup shredded sharp cheddar cheese
- 1/2 cup grated Parmesan cheese, divided
- 1/3 cup breadcrumbs
- 2 tablespoons butter, melted
- Preheat oven to 450 F. Prepare rice according to package directions.
- In large bowl, toss Brussels sprouts, ham, garlic, olive oil, 1/4 teaspoon salt and 1/4 teaspoon pepper. Place on parchment paper-lined baking tray and roast 12-15 minutes, or until caramelized. Decrease oven temperature to 425 F.
- In large bowl, toss rice, Brussels sprouts mixture, cream, chives, Dijon mustard, remaining salt and remaining pepper. Stir in cheddar and 1/3 cup Parmesan cheese. Transfer mixture to greased, 2-quart baking dish.
- In small bowl, stir breadcrumbs, remaining Parmesan and melted butter. Sprinkle over rice mixture.
- Bake 12-15 minutes, or until golden brown and bubbling.
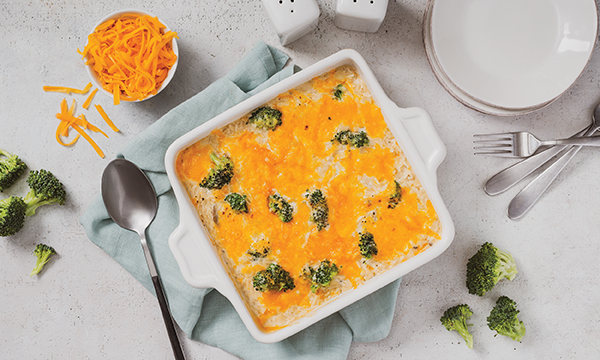
Broccoli and Cheese Rice Casserole
Prep time: 5 minutes
Cook time: 30 minutes
Servings: 4-6
- 1 bag Success White Rice or Brown Rice
- nonstick cooking spray
- 1 can (10 3/4 ounces) condensed cream of mushroom soup
- 2 cups frozen broccoli florets, thawed and drained
- 1 1/2 cups shredded cheddar cheese, divided
- 1/2 cup evaporated milk
- 3 tablespoons butter, melted
- 1 tablespoon grated onion
- 1/2 teaspoon salt
- 1/2 teaspoon black pepper
- Prepare rice according to package directions. Preheat oven to 350 F.
- Coat 2-quart casserole dish with nonstick cooking spray. In medium bowl, combine soup, broccoli, 1 cup cheddar cheese, evaporated milk, butter, onion, salt and pepper. Fold in rice.
- Pour mixture into prepared dish and top with remaining cheddar cheese. Bake 20 minutes.
SOURCE:
Success Rice
At our core, we at STM Daily News, strive to keep you informed and inspired with the freshest content on all things food and beverage. From mouthwatering recipes to intriguing articles, we’re here to satisfy your appetite for culinary knowledge.
Visit our Food & Drink section to get the latest on Foodie News and recipes, offering a delightful blend of culinary inspiration and gastronomic trends to elevate your dining experience.
https://stmdailynews.com/category/food-and-beverage
You can also find food and beverage-related videos on our YouTube channel, where we regularly post new content and share tips, recipes, and demonstrations. https://youtube.com/playlist?list=PLEhXBupt8tVynuUhpQZMxQt4lvPmOiAtQ&si=InDwc7YaB0KIwmxy
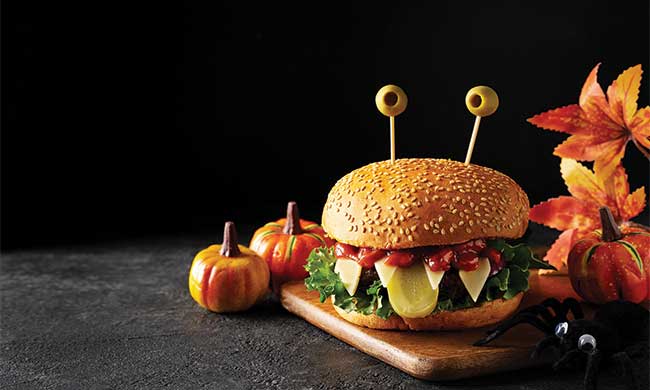
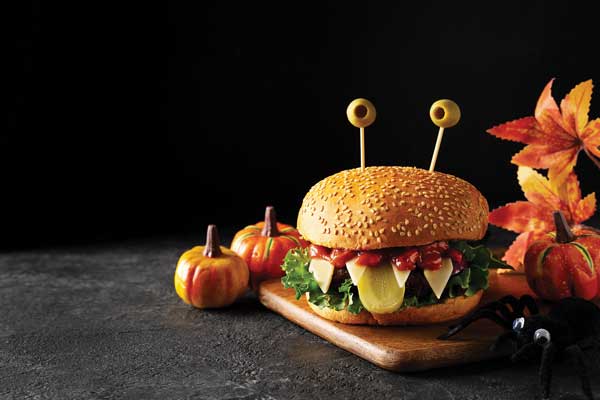
(Feature Impact) Out with the ordinary, in with the weird – that’s what the Halloween season is all about. These Halloween Monster Burgers give a ghoulishly fun twist on burger night, featuring all your favorite toppings transformed into olive eyes, cheese fangs and a pickle tongue.
Whether you reach for a traditional hamburger patty or switch it up with chicken, turkey, bean or veggie options, the effect is the same: a dinner that looks like it escaped from a mad scientist’s lab. It’s a good way to get some protein and veggies into kids before the trick-or-treating sugar rush, and you can even make it interactive by inviting them to decorate their own monsters and come up with creative variations.
Alternatively, if you’re looking for some spooky hors d’oeuvres to impress at this year’s Halloween party, these burgers are easy to size down into slider form. Serve a whole tray of mini monsters ready to devour – or be devoured by – hungry guests.
Find more Halloween recipe inspiration at Culinary.net.
Halloween Monster Burgers
Recipe adapted from Happy Foods Tube
Prep time: 10 minutes
Total time: 18 minutes
Servings: 4
- 4 hamburger, chicken or veggie patties
- 4 tablespoons mayonnaise
- 4 teaspoons ketchup, plus additional, to taste, divided
- 4 hamburger buns
- 8 leaves baby romaine lettuce
- 4 slices dill pickles, sliced lengthwise
- 4 cheese slices
- 8 large green olives, pits removed
- Cook burger patties until they reach desired doneness.
- In small bowl, combine mayonnaise and 4 teaspoons ketchup. Spread each bun base with about 1 tablespoon mayo sauce then add two lettuce leaves and cooked burger patty.
- Add pickle slice as monster “tongue.” Take each cheese slice and cut triangles into one side to resemble teeth; add to burger then cover with ketchup “blood,” to taste.
- Stick olives on toothpicks and add two to each top bun as “eyeballs.”
Photo courtesy of Shutterstock

SOURCE: