recipes
Savor the Season with Fresh, Roasted Pork
Roasted Pork: Upgrade your holiday menu with a Stuffed Boneless Pork Loin Roast featuring fragrant stuffing made of vegetables, bread, and apples. This centerpiece, made from Coleman All-Natural Meat’s humane-certified pork, celebrates 150 years of quality. Discover more festive recipes at ColemanNatural.com.

Last Updated on November 2, 2025 by Daily News Staff
Savor the Season with Fresh, Roasted Pork
(Family Features) If this year’s holiday menu is in need of an upgrade, look no further than the main course. A twist on tradition may be all that’s necessary to take seasonal meals up a level for a fresh way to savor the season and celebration.
Pork can become your family’s new festive favorite with this showstopping Stuffed Boneless Pork Loin Roast at the center of the feast. Fragrant stuffing made from aromatic veggies, bread, sage, rosemary and apples turns a simple pork loin into a dazzling dish that’s sure to wow loved ones.
This roast is perfectly suited for a holiday gathering with Coleman All-Natural Meat’s humane-certified Boneless Center Cut Pork Butt Roast. With a leading legacy as an all-natural meat provider since 1875, it’s celebrating its 150-year anniversary this season.
The milestone celebrates and recognizes a family heritage and commitment to all-natural, humanely raised meats sourced from American farmers, raised with no antibiotics ever, no added hormones and fed an all-vegetarian diet.
A delicious, extravagant way to upgrade your family’s main course this season, you just might’ve found a new favorite way to ring in the holidays with a tender, juicy, effortlessly sliced roast. Find more holiday recipe ideas by visiting ColemanNatural.com.
Stuffed Boneless Pork Loin Roast
Prep time: 40 minutes
Cook time: 95 minutes
Servings: 6
- 1 Coleman Natural boneless pork roast (3-4 pounds)
- 1 tablespoon extra-virgin olive oil
- 1 tablespoon butter
- 1/2 cup diced celery
- 1/2 cup diced carrots
- 1/2 cup diced onions
- 2 large eggs
- 1/2 cup milk
- salt, to taste
- pepper, to taste
- 1 tablespoon fresh sage
- 1 tablespoon fresh rosemary
- 2 cups cubed fresh bread, crust removed
- 1 apple, diced
- gravy, for serving
- Preheat oven to 375 F.
- Butterfly roast.
- In large skillet over medium-high heat, heat oil and butter. Add celery, carrots and onions; cook until softened, about 5 minutes.
- While vegetables are cooking, whisk eggs; milk; salt, to taste; and pepper, to taste, until well combined. Mince sage and rosemary.
- In large bowl, combine bread, vegetable mixture, liquid ingredients, apples, sage and rosemary. Gently toss until bread absorbs most of the liquid.
- Cut three pieces of butcher’s twine about 4 inches longer than the longest side of butterflied roast. Lay string on cutting board horizontally and lay roast on top of string to cover.
- Place half of the stuffing mixture onto butterflied pork loin and press down firmly. Roll roast up and tie with butcher’s twine to hold it together, taking care not to tie too tightly, and press any stuffing that comes loose back into ends of roast.
- Place stuffed and tied roast, fat cap up, on rack over baking sheet. Season liberally with salt and pepper; roast until meat thermometer inserted into roast registers 140 F, 75-90 minutes.
- Place remaining stuffing in a small ovenproof casserole dish and cover with foil. After roasting 30 minutes, place extra stuffing in oven to cook alongside roast.
- Remove foil from extra stuffing and remove roast from oven. Let rest for 10 minutes then remove the extra stuffing from oven.
- Cut twine from roast and discard. Cut roast into six thick slices, taking care not to lose stuffing. Serve with extra stuffing and gravy.
SOURCE:
Coleman Natural Foods
https://stmdailynews.com/the-fate-of-lucky-supermarkets-in-socal/
At our core, we at STM Daily News, strive to keep you informed and inspired with the freshest content on all things food and beverage. From mouthwatering recipes to intriguing articles, we’re here to satisfy your appetite for culinary knowledge.
Visit our Food & Drink section to get the latest on Foodie News and recipes, offering a delightful blend of culinary inspiration and gastronomic trends to elevate your dining experience.



(Feature Impact) Fall flavors and Halloween decorations make an ideal seasonal combination. These Cinnamon Spiced Ghost Cupcakes are the perfect example, with the warmth and sweetness of the cake offering a tasty base for piles of frightful frosting. All it takes to transform a swirl of white buttercream into a spooky ghost is a couple dots of food coloring, chocolate chips or another candy of choice.
They’re simple to make, easy to personalize and fun for all ages, whether you’re baking a tray for kids to decorate or bringing them to a Halloween party. Add sprinkles, a dusting of cinnamon or decorations that fit your theme.
Find more seasonal recipes to enjoy at Culinary.net.

Cinnamon Spiced Ghost Cupcakes
Recipe adapted from The Marble Kitchen
Prep time: 20 minutes
Cook time: 16 minutes
Servings: 12
- 1 1/4 cups all-purpose flour
- 3/4 teaspoon baking powder
- 2 teaspoons ground cinnamon
- 1/2 teaspoon kosher salt
- 6 tablespoons unsalted butter, at room temperature
- 1/2 cup granulated sugar
- 1/4 cup brown sugar
- 1 egg, at room temperature
- 3/4 cup milk
- 1 teaspoon vanilla extract
Vanilla Buttercream Frosting:
- 1 cup unsalted butter, at room temperature
- 1/2 teaspoon salt
- 4 cups powdered sugar, sifted
- 3-5 tablespoons heavy cream, at room temperature
- 1 tablespoon vanilla extract
- black food dye or chocolate chips
- Preheat oven to 350 F and line cupcake pan with paper liners.
- In medium bowl, combine flour, baking powder, cinnamon and salt.
- Using electric or stand mixer, cream butter, sugar and brown sugar about 4 minutes on medium or medium-high speed until light and fluffy. Add egg, mixing well and scraping down bowl.
- In small bowl or measuring cup, whisk milk and vanilla. Set aside.
- Add 1/3 dry ingredient mixture to butter mixture and beat until combined. Add 1/2 milk mixture and mix well. Continue alternating dry and wet ingredients.
- Bake about 16 minutes, or until toothpick inserted in middle of cupcake comes out clean. Cool in pan 5 minutes then transfer to wire rack to cool completely before frosting.
- To make frosting: Using electric or stand mixer, beat butter and salt on medium-high speed 5 minutes, scraping down bowl halfway through.
- Reduce speed to low and add sugar 1/2 cup at a time, alternating with heavy cream until 3 tablespoons have been added. Stop occasionally to scrape down bowl. Once all sugar is in, add vanilla and beat on medium-low 1 minute until light and fluffy. If desired, add additional cream 1 teaspoon at a time until frosting reaches preferred consistency.
- Place buttercream in piping bag with large round tip. Pipe tall mounds of frosting on each cupcake in ghost shapes (wider on bottom, narrower on top). Add dots of black food dye or chocolate chips for eyes.
Photo courtesy of Unsplash

SOURCE:

Food and Beverage
Make Mealtime Easier with These Air Fryer Recipes
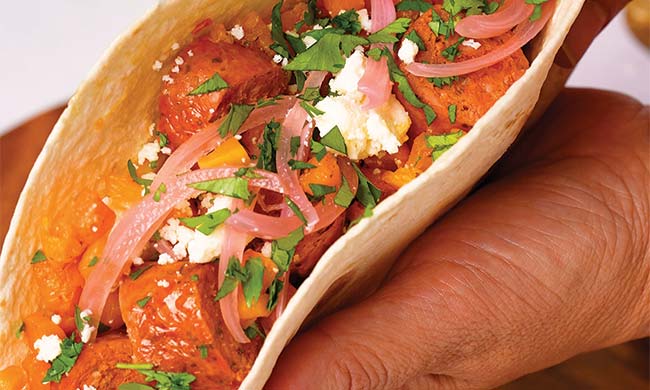
When busy weeknights begin to make dinners feel more like a race against the clock than a chance to slow down, families need meals that come together quickly without defaulting to takeout. Whether you’re cooking for a busy weeknight or simply looking to try something new, recipes like Air Fryer Butternut Squash and Chorizo Tacos and Air Fryer Chicken Katsu Bowls can help you get more from your air fryer.
(Feature Impact) When busy weeknights begin to make dinners feel more like a race against the clock than a chance to slow down, families need meals that come together quickly without defaulting to takeout. One solution may already be sitting on your counter: an air fryer.
Air fryers are now found in 7 of 10 American homes, according to new consumer research from the National Frozen and Refrigerated Foods Association, but consumers are still learning how to use them beyond dinner, despite nearly 9 in 10 owners saying they’d like to discover more ways to get the most from their air fryer.
Nearly two-thirds (65%) of air fryer users said the appliance is faster than their oven, making it a convenient solution for everything from quick breakfasts and lunches to snacks and weeknight dinners. With the added convenience encouraging users to eat at home more often, air fryers can also help stretch the family food budget.
If you’re looking to get more from your air fryer, start by thinking beyond dinner. Frequent users treat air fryers as an all-day essential, putting them to work for breakfast, quick lunches, after-school snacks and beyond. Look for frozen and refrigerated products that include air fryer directions on the packaging, such as frozen potatoes and vegetables, then visit Easy Home Meals for even more recipe inspiration.
//www.youtube.com/embed/QotJkv_MFu8
Whether you’re cooking for a busy weeknight or simply looking to try something new, recipes like Air Fryer Butternut Squash and Chorizo Tacos and Air Fryer Chicken Katsu Bowls can help you get more from your air fryer while bringing fresh flavors to the table.
For more air fryer recipes, tips and inspiration for every meal occasion, visit EasyHomeMeals.com.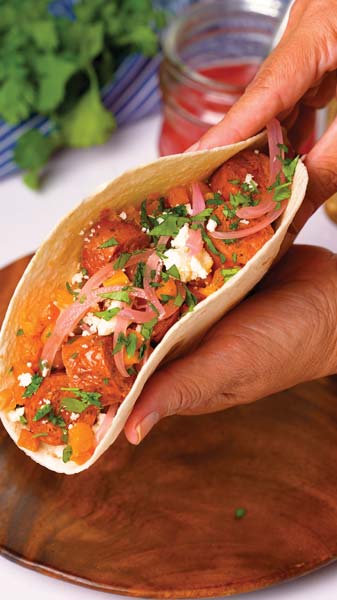
Air Fryer Butternut Squash and Chorizo Tacos
Recipe courtesy of Easy Home Meals
Total time: 15-30 minutes
Servings: 1-4
- 1 pound fresh chorizo sausage links
- 1 pound frozen, diced butternut squash
- 1 tablespoon olive oil
- kosher salt, to taste
- freshly ground black pepper, to taste
- 12 flour tortillas (6 inches)
- 1/2 cup crumbled queso fresco
- 1/4 cup pickled red onions
- chopped fresh cilantro, for garnish
- Preheat air fryer to 400 F 5 minutes. Place chorizo and butternut squash in even layer in air fryer basket. Drizzle with olive oil and toss to coat. Season with salt and pepper, to taste. Air-fry 10-14 minutes, flipping sausage and butternut squash halfway through, until chorizo’s internal temperature reaches 160 F and vegetables are tender.
- Transfer sausage to cutting board. Cut into 1/4-inch slices. Top tortillas with sausage and butternut squash. Garnish with queso fresco, pickled red onions and cilantro.
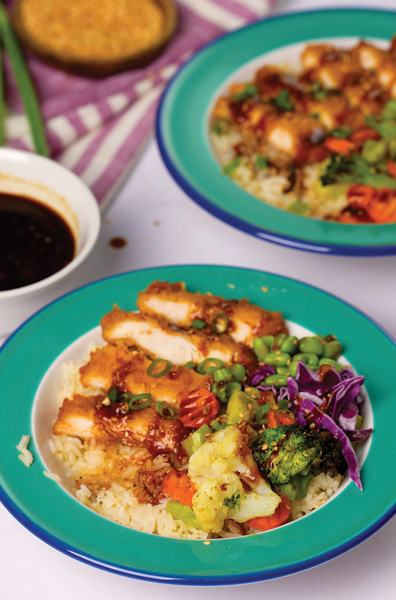
Air Fryer Chicken Katsu Bowls
Recipe courtesy of Easy Home Meals
Total time: 15-30 minutes
Servings: 1-4
- 1/4 cup ketchup
- 1/4 cup Worcestershire sauce
- 1 tablespoon molasses
- 1 1/2 teaspoons soy sauce
- 1 1/2 teaspoons sugar
- 1 clove garlic, finely grated
- 2 frozen, breaded chicken breast cutlets
- 1 bag (10.8 ounces) frozen California blend vegetables, such as broccoli, cauliflower and carrots
- 1 tablespoon olive oil
- kosher salt, to taste
- freshly ground black pepper, to taste
- 1 microwavable bag (8.5 ounces) jasmine rice, prepared and kept warm
- 1 cup shredded purple cabbage
- 1/2 cup shelled edamame
- toasted sesame seeds, for garnish
- chopped green onions, for garnish
- In small bowl, combine ketchup, Worcestershire sauce, molasses, soy sauce, sugar and garlic. Set aside.
- Preheat air-fryer to 400 F 5 minutes. Place chicken cutlets in even layer in air-fryer basket. Arrange vegetables in even layer around chicken cutlets. Drizzle vegetables with oil and season with salt and pepper, to taste. Cook 10-15 minutes, flipping cutlets halfway through, until lightly browned and crisp and vegetables are tender. Slice chicken cutlets.
- Divide prepared rice evenly between bowls. Top with chicken cutlets, vegetables, cabbage and edamame. Garnish with sesame seeds and green onions. Serve with ketchup mixture.

SOURCE:
National Frozen and Refrigerated Foods Association
(Feature Impact) Game day is about more than the big plays, touchdown-saving tackles and final score. Whether you’re gathering in the stadium parking lot or hosting friends for an at-home watch party, a memorable experience begins long before kickoff.
Start your pregame festivities with an MVP-worthy spread that’s simple to serve, easy to eat and keeps fans full through the final whistle. For example, the flavor of Buffalo is a game-day staple, but wings aren’t the only way to enjoy it.
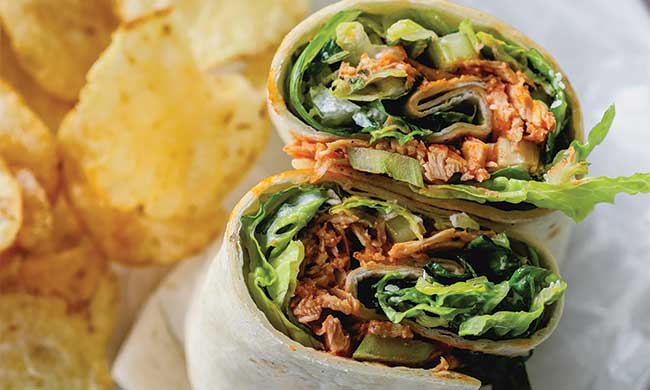
For less mess, Buffalo Chicken Caesar and Celery Wraps pair convenience with the cool crunch of Dandy Celery, a year-round superstar ingredient for many of your favorite football-inspired dishes. It’s packed with flavor and low in calories, making it a smart choice for snacking.
The contrasting tastes and textures offer a satisfying bite, whether you slice the wraps into smaller portions for appetizer-style serving or leave them whole for fans with hearty appetites.
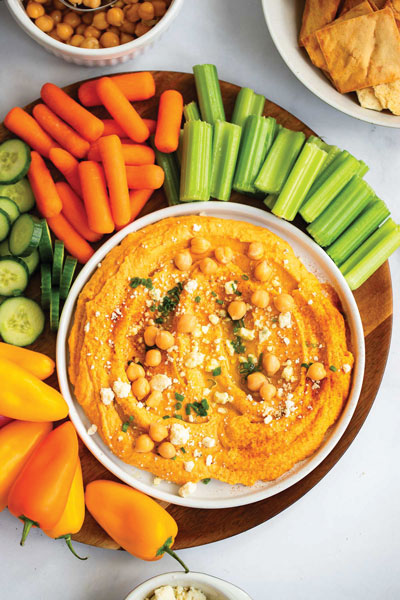
Nervous nibblers during the game’s most tense moments may prefer a lighter bite, and that’s where a dependable dip can come through in the clutch. This Buffalo Hummus recipe puts a tailgate-spin on the familiar favorite, combining creamy texture with a little heat.
Serve it alongside crackers, chips or crisp vegetables like Dandy celery dippers, fresh-cut celery sticks that are pre-washed and ready to eat at your convenience – a true time-saver when the clock is ticking.
Design your own winning game plan by finding more tailgating recipes at DudaFresh.com.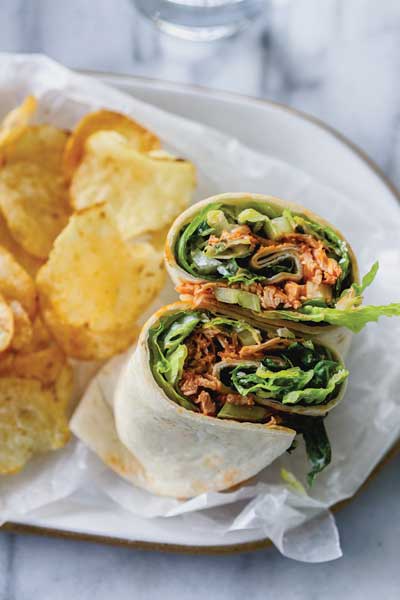
Buffalo Chicken Caesar and Celery Wraps
Servings: 4
- 2 cups shredded rotisserie chicken
- 1/4 cup Buffalo sauce
- 2 cups Dandy romaine hearts, chopped
- 1 cup Dandy celery, chopped (about 4 ribs)
- 1/3 cup Caesar dressing
- 1/4 cup grated Parmesan cheese
- 1/2 teaspoon black pepper
- 4 large flour tortillas (10 inches)
- In bowl, toss shredded chicken with Buffalo sauce. Set aside.
- To make salad: In separate bowl, combine romaine, celery, Caesar dressing, Parmesan cheese and black pepper. Mix well.
- To assemble wraps: Spoon about 1/4 cup Buffalo chicken along center of each tortilla, leaving small border at each end; top with Caesar salad. Fold up bottom of tortilla over filling then fold in sides and roll up tightly. Slice in half diagonally.
Buffalo Hummus
Prep time: 5 minutes
Servings: 8
- 1 can (15 ounces) chickpeas, drained and rinsed
- 1/4 cup tahini
- 1/4 cup Buffalo sauce
- 2 tablespoons olive oil
- 1/2 lemon, juice only
- 2 cloves garlic
- 2-3 tablespoons ice water
- dairy-free blue cheese, for garnish (optional)
- chopped chives, for garnish (optional)
- paprika, for garnish (optional)
- olive oil, for garnish (optional)
- Dandy Celery Dippers
- pita chips
- In food processor, puree drained chickpeas, tahini, Buffalo sauce, olive oil, lemon juice and garlic until smooth, stopping to scrape down sides as needed. Add water through lid until desired consistency is achieved.
- Spread hummus onto serving plate or bowl. Garnish, if desired, with dairy-free blue cheese, chopped chives, paprika and drizzle of olive oil. Serve with celery dippers and pita chips.

SOURCE: